

















Reverse Osmosis Water Filter Tank Pressure

What is Tank Pressure in an RO System
In a reverse osmosis (RO) water filtration system, the tank pressure refers to the air pressure inside the water storage tank that pushes purified water out when you open a faucet. Unlike gravity-fed systems, an RO unit uses a pressurized storage tank with a pre-charged air bladder. This air pressure is what allows you to get a steady stream of water without waiting for the filter to produce it on demand.
The Role of Pressurized Tanks in RO Water Storage and Dispensing
An RO system produces pure water slowly — about a few ounces per minute. A pressurized storage tank acts like a water reserve, holding several gallons and releasing it quickly when needed. Inside the tank, purified water is stored on one side of a rubber bladder, while compressed air sits on the other side. When you open your faucet, the air pressure pushes the water out. This design:
- Maintains consistent flow to your faucet
- Prevents strain on the RO membrane by distributing water efficiently
- Stores purified water so the system doesn’t need to run constantly for every sip
Typical RO Tank Pressure Range in PSI
RO tank pressures differ when empty versus when they are full of water:
| Tank Condition | Recommended Pressure Range |
|---|---|
| Empty (Pre-Charge) | 5–7 psi |
| Full (Under Use) | 30–50 psi |
These ranges are important for both bladder-type tanks and similar pressurized storage designs.
How Pressure Affects Water Output and Filtration Efficiency
The right tank pressure ensures that your RO system delivers good flow and keeps your storage tank capacity high.
- Too Low Pressure – Slow water flow, tank fills incompletely, and air bladder may be underinflated.
- Too High Pressure – Smaller storage capacity, poor water output, and potential system strain.
- Balanced Pressure – Allows maximum water volume in the tank and smooth delivery while protecting filters and membranes from overwork.
Maintaining the correct reverse osmosis tank pressure PSI ensures you get fast, consistent water flow and the best filtration performance from your system.
How to Check Your RO Water Filter Tank Pressure
Keeping the right reverse osmosis tank pressure PSI is key for smooth water flow and optimal filtration. Checking it isn’t complicated, but it has to be done correctly to avoid false readings.
Tools You Will Need
Before you start, gather these tools:
- Low-pressure tire gauge or digital pressure gauge (good for 0–20 psi readings)
- Adjustable wrench (if needed to remove protective caps)
- Towel or small bucket (to catch any drips)
Tip: A standard tire gauge works fine, but avoid high-range gauges meant for car tires—they can be inaccurate for RO systems.
Step-by-Step Process to Measure RO Tank Pressure Accurately
- Turn off the water supply to your RO system.
- Drain all water from the tank
- Open the RO faucet and let it fully drain until water stops flowing. This ensures you’re checking the pre-charge pressure (air only, no water).
- Locate the air valve (usually beneath the plastic cap on the top or side of the tank—it looks like a bicycle tire valve).
- Attach the pressure gauge to the valve and record the reading.
- Compare your reading to the recommended empty-tank pre-charge—typically 5–7 psi.
- If the pressure is too high, press the pin to release some air. If too low, use a hand pump to add air in small amounts, checking the reading after each adjustment.
- Replace the protective cap and reconnect the system.
How Often to Check RO Tank Pressure
- Every 6–12 months during your filter change schedule.
- Anytime you notice slow water flow or the tank seems to be running out too quickly.
- After replacing the RO tank bladder or entire tank.
Keeping an eye on RO water tank air charge avoids problems like reduced storage capacity, weak flow at the faucet, or over-stressing the tank. If you also suspect other system issues, you can refer to reverse osmosis system troubleshooting for a deeper check-up.
Ideal Pressure Levels for RO Water Filter Tanks
Getting the right reverse osmosis tank pressure is key for making sure your system delivers a steady flow of clean water and doesn’t overwork. Pressure that’s too low or too high can hurt performance and shorten the tank’s life. Here’s what to aim for:
Recommended Pre Charge Pressure for Empty RO Tanks
When the tank is completely empty (no water inside), you should set the pre-charge air pressure to around 5–7 psi. This gives the bladder inside the tank the right amount of push to work properly when water starts to fill it. You can adjust this using a standard tire gauge and bike pump or air compressor.
Pressure Range During Normal Use
When the tank is filling and in use:
- Filling pressure: Incoming water gradually compresses the air bladder
- Typical range in a working system: 30–50 psi (max) by the time it’s full
- This range keeps water flowing smoothly to the faucet without stressing the system
A quick reference:
| Tank State | Ideal Air Pressure | Notes |
|---|---|---|
| Empty (pre-charge) | 5–7 psi | Set before reconnecting to system |
| In use (full) | 30–50 psi | System dependent, not adjustable |
Bladder Tanks vs Non Bladder Tanks
Most household RO systems in the U.S. use bladder-style pressure tanks. These tanks have a rubber bladder or diaphragm separating air and water, which makes them efficient, compact, and able to keep consistent pressure until the water runs low.
Key differences:
- Bladder tanks: Maintain steady pressure, don’t need constant draining, allow higher usable water volume.
- Non bladder tanks: Rare in RO setups, usually need gravity flow, and don’t hold pressure in the same way.
Maintaining the ideal pressure is simple but critical — it keeps water flowing faster, protects your RO membranes, and ensures you get the most from every gallon of purified water.
Symptoms and Effects of Incorrect Reverse Osmosis Tank Pressure
If your reverse osmosis water filter tank pressure is off, the system will show warning signs. Both low tank pressure and high tank pressure can affect how well your RO system stores, delivers, and filters water.
Low Tank Pressure Problems
When the pre-charge pressure or working pressure in the tank drops below the ideal range, you may notice:
- Slow water flow – Water comes out of the faucet weak or takes longer to fill cups.
- Tank not filling fully – The system shuts off too soon, leaving less usable water in storage.
- Frequent filter cycles – The unit runs more often, which can wear out parts faster.
Low pressure often means there’s not enough air in the RO tank bladder to push water out, reducing overall output.
High Tank Pressure Problems
On the other hand, if the air charge is too high:
- Reduced water storage capacity – The higher air pressure leaves less room for water inside the tank.
- Possible leaks – Over time, extra stress on fittings and seals can cause water leaks.
- Tank or bladder damage – The flexible bladder inside the tank can stretch or rupture.
This situation makes the system work harder and can shorten its lifespan.
Effects on Water Quality and Filtration
Incorrect tank pressure isn’t just about flow—it can affect the taste and quality of the water.
- Low pressure may cause incomplete flushing of the membrane, allowing impurities to remain.
- High pressure can strain the RO membrane, reducing its ability to filter effectively.
Maintaining the correct RO tank PSI keeps your water running at the right speed, helps protect your equipment, and ensures you always get clean, fresh-tasting water.
How to Adjust and Maintain Your RO Tank Pressure
Keeping the right reverse osmosis (RO) tank pressure is key for proper water flow and long system life. If the pressure is too high or too low, you’ll notice slower dispensing, frequent cycling, or even damage to the tank bladder. Here’s a simple way to check, adjust, and maintain it.
Tools You Will Need
- Air pressure gauge (tire gauge works fine)
- Bicycle pump or small air compressor (manual pumps give better control)
- Adjustable wrench (for removing tank connections if needed)
- Towel or bucket (to catch any drips)
Safety and Prep Steps
- Shut off the water supply to the RO system.
- Drain the tank fully by opening the faucet until no more water comes out.
- Disconnect the tank from the system if you prefer easier access, but this isn’t always necessary.
- Check pressure only when the tank is empty—this ensures an accurate reading of the pre-charge pressure.
How to Adjust Tank Pressure
- Remove the air valve cap on the side or bottom of the RO storage tank.
- Use your pressure gauge to measure the current pre-charge (should be around 5–7 psi for an empty tank).
- If pressure is low: Add air slowly with a bicycle pump until it reaches the recommended psi.
- If pressure is high: Press the valve pin gently to release air until it’s in the correct range.
- Replace the cap firmly and reconnect the tank to the RO system.
Pro tip: Avoid adding too much pressure—it can crush the internal bladder or reduce water storage capacity.
Routine Maintenance Tips
- Check pressure every 6–12 months—more often if you notice slower water flow.
- Keep the tank in a cool, dry spot to avoid premature bladder wear.
- After filter replacements or major maintenance, recheck tank pressure to ensure balance.
- Watch for rust spots, leaks, or persistent low pressure—these may mean the bladder is damaged.
When to Replace the Tank or Bladder
- Tank cannot hold air charge after topping up.
- You hear water sloshing with no change in output pressure.
- Visible corrosion or leaks from seams.
- Constant slow flow even after proper pressure adjustment.
If your tank shows these signs, replacement is usually more cost-effective than repair. To help you troubleshoot beyond pressure issues, you might find our reverse osmosis system troubleshooting guide useful.
Common Problems Related to RO Tank Pressure and Solutions
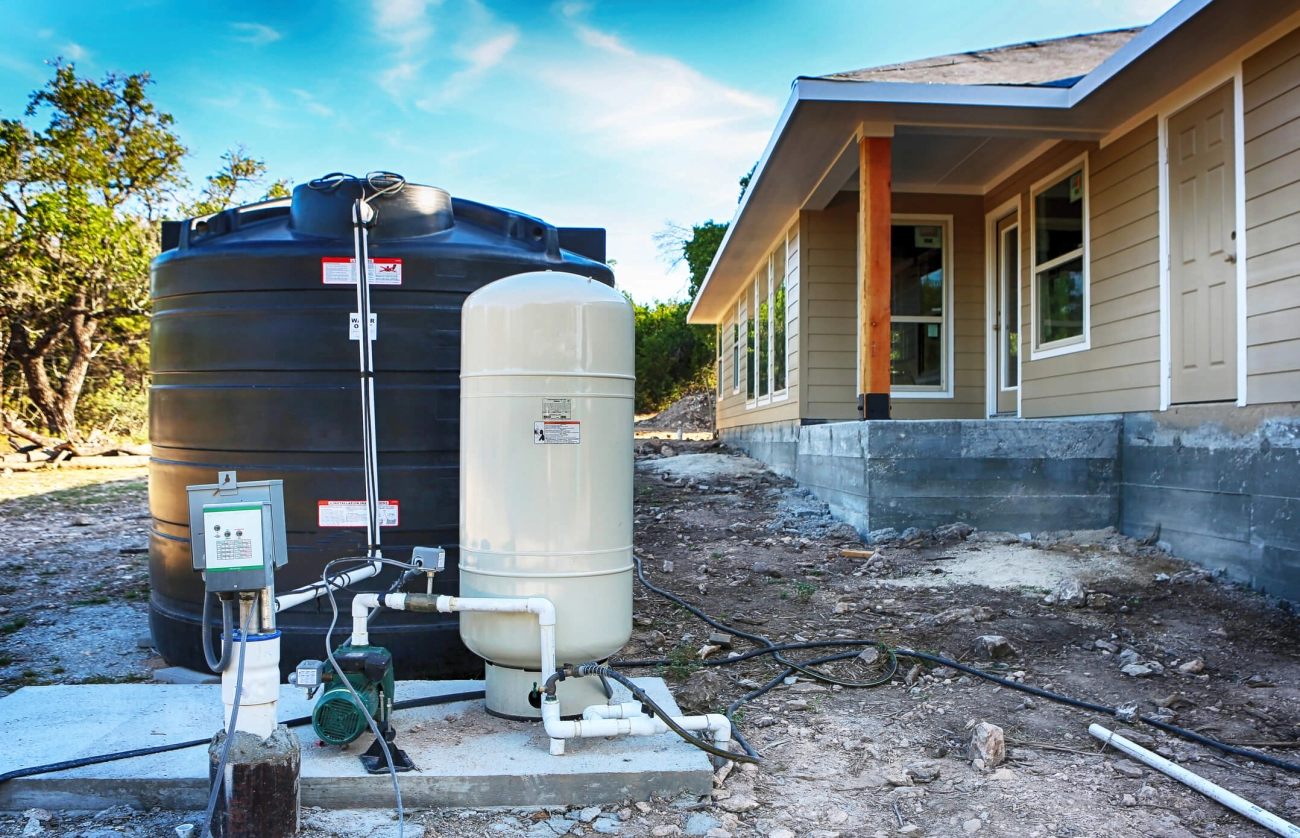
When your reverse osmosis (RO) water filter tank pressure isn’t right, you’ll start to notice slower water flow, odd noises, or even leaks. Knowing what to look for helps you fix the issue before it damages your system.
Leaking Tanks or Damaged Bladders
A pressurized RO tank has a bladder inside that separates water from the air chamber.
- What happens: If the bladder cracks or ruptures, water can leak around the air valve, or the tank won’t hold pressure.
- Why it matters: A damaged bladder means the tank can’t store water properly, which leads to constant slow flow.
- Fix: If the bladder is torn, the only solution is to replace the tank. For minor leaks at fittings, try tightening or replacing the connection.
Inadequate Water Storage and Slow Refill
Low water output is usually linked to improper tank pressure or a failing bladder.
- What happens: Tank takes longer to fill, and you get only a cup or two of water before the flow drops.
- Possible causes: Pre-charge pressure too high, too low, or membrane output issues.
- Fix:
- Empty the tank completely.
- Check air pressure (should be 5–7 psi when empty).
- Adjust if needed with a bicycle pump or air compressor. (Read our guide on how to test RO tank pressure for step-by-step help.)
Air Getting Into the Faucet or Water Lines
Hearing air spurts or gurgles from the faucet?
- What happens: The bladder may have failed, allowing air to escape into the water side, or the feed line has a loose connection.
- Fix:
- Inspect fittings and tubing for leaks.
- If air is leaking from inside the tank, replace the bladder or entire tank.
Troubleshooting Checklist
- Low water flow
- Check pre-charge pressure when tank is empty.
- Verify membrane and filter condition.
- Leaking tank
- Inspect air valve for moisture (sign of bladder failure).
- Check fittings for tightness.
- Air spurts in water
- Check tubing connections.
- Replace tank if bladder is compromised.
- Slow refill rate
- Examine pre-filters for clogs.
- Check for low incoming water pressure to the RO system.
Keeping an eye on these pressure-related problems can save you from costly RO system breakdowns and poor-tasting water.
driplife Recommendations for RO Tank Pressure Care
Quality Standards for driplife RO Tanks
driplife RO tanks are built to meet strict FDA-grade and NSF-certified standards, using food-grade materials that won’t affect water taste or quality. The internal bladder system is designed for long-term pressure stability, so you get steady water output for years without frequent air recharge. Every tank is tested for leak resistance, PSI consistency, and durability before it ships out.
Pro Tips to Prolong Tank Life and Maintain Pressure
To keep your reverse osmosis water tank performing at its best, focus on consistent maintenance and proper pressure checks:
- Check pressure once or twice a year using a tire pressure gauge (only when the tank is empty).
- Maintain the pre-charge at 5–7 psi for empty tanks to ensure full storage capacity.
- Avoid overpressurizing — anything above the recommended range (30–50 psi when full) can damage the bladder.
- Keep your RO system’s pre-filter and post-filter changed on schedule; clogged filters make the tank work harder.
- If you notice slower output, test the tank pressure before assuming other parts have failed.
Customer Support and Service Options
driplife offers U.S.-based customer service for troubleshooting, maintenance guidance, and replacement parts. We also provide:
- Step-by-step RO tank pressure adjustment guides
- Assistance in diagnosing low flow or overpressure issues
- Expert help in identifying bladder damage or tank leaks
- Access to approved replacement tanks and parts
If you’re unsure how to test or adjust the tank pressure, our team can walk you through it to prevent mistakes that shorten the tank’s lifespan.
You can also see our reverse osmosis system troubleshooting guide for more maintenance help and problem-solving tips.