
















The “Under-Sink” Reality: Why Space Is the Biggest Hurdle
If you’ve ever opened your sink cabinet and thought, “There’s no way a reverse osmosis system will fit in here,” you’re not alone. Modern kitchens, especially apartments and small homes, squeeze a lot into a very tight under-sink space: a garbage disposal, pull-out trash, cleaning supplies, and a maze of pipes and hoses. That’s exactly why compatibility of tankless RO systems with standard kitchen cabinets has become such a big topic.
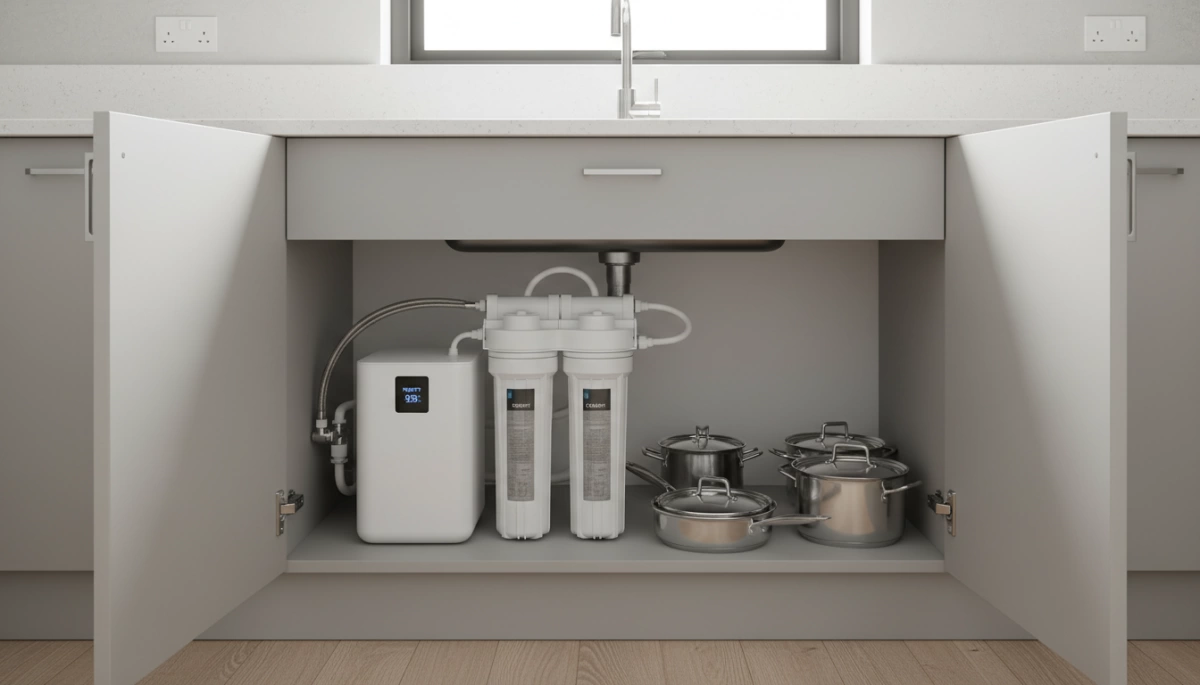
In a traditional setup, a tank RO system uses two main components: a separate filter manifold plus a bulky storage tank that often takes up over half the usable cabinet floor. Once you add a garbage disposal and maybe a pull-out trash can, your usable under-sink cabinet space can drop fast, leaving almost no room to maneuver. This is where many homeowners realize that a standard tank RO just isn’t retrofit-friendly in tight spaces.
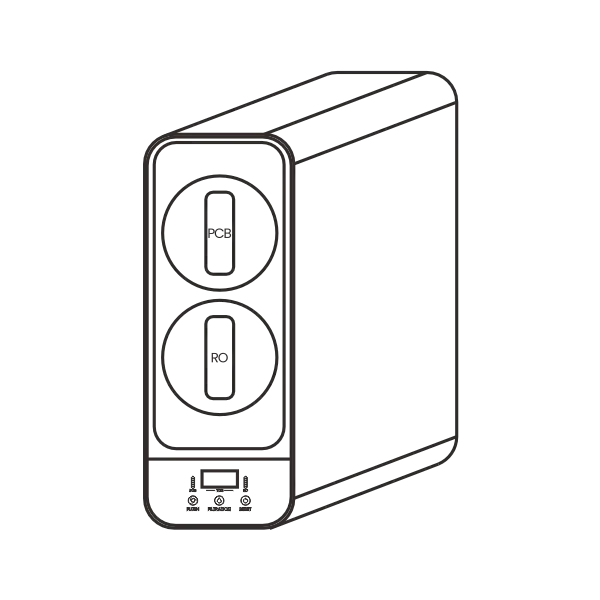
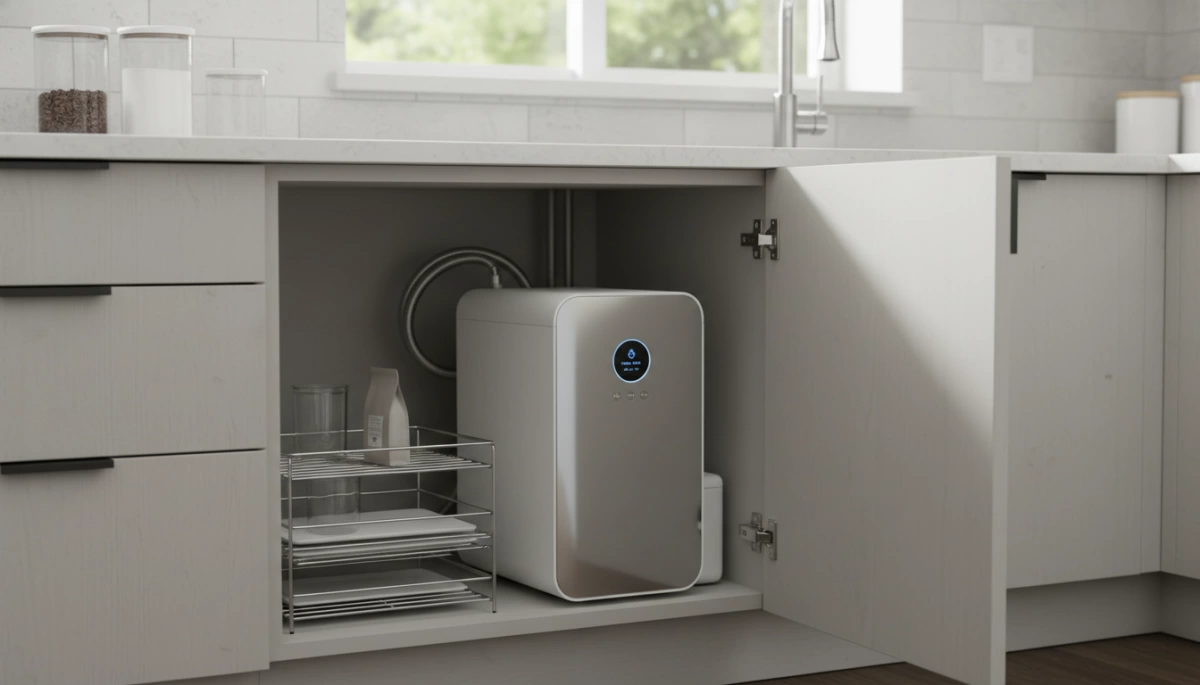
A tankless reverse osmosis under-sink system solves this footprint problem by integrating the filtration and internal waterway into a single, compact housing. Instead of losing the entire cabinet floor to a tank, you have a slim, vertical unit that can usually sit against the side or back wall, leaving room for a disposal, P-trap, and even a narrow pull-out trash can. This space-saving reverse osmosis system design dramatically improves under sink clearance for tankless RO in standard 24″ and 30″ base cabinets.
Our own tankless RO housing is engineered specifically around standard kitchen base cabinet dimensions in the U.S. We design the width and depth to clear common obstacles like the P-trap and drain line, while the height is optimized so it can slide in under the sink bowl and still allow the cabinet doors to close freely. By minimizing tubing clutter and eliminating the storage tank, a compact RO system for small kitchen cabinets becomes not just possible, but practical for most standard layouts.
In short, if cabinet space is your biggest worry, a tankless RO vs traditional tank RO footprint comparison almost always favors the tankless option. The smart, integrated design makes under-counter tankless water filter fit far more realistic in tight, real-world cabinets where every inch matters.
Defining the “Standard” Kitchen Cabinet for Tankless RO
When we talk about compatibility of tankless RO systems with standard kitchen cabinets, we’re really talking about usable under-sink space, not just the cabinet label on the box.
Standard Cabinet Dimensions (US & EU)
In most U.S. homes, “standard” under-sink base cabinets are:
- Width: 30″–36″ outside (often 33″ is common under the kitchen sink)
- Depth: 24″ outside (around 22″ usable inside)
- Height: 34.5″ to the top of the cabinet box (about 28″–30″ clear inside below the sink)
In many EU kitchens, base units are slightly narrower and more modular, but you still see:
- Width: 60 cm–80 cm
- Depth: 55 cm–60 cm (around 50 cm usable inside)
- Height: 72 cm–78 cm box height
These sizes give us a rough envelope for under sink clearance for tankless RO in both markets.
Usable Space vs Real Cabinet Fit
The big catch with tankless reverse osmosis under-sink fit is that you never get to use the full box:
- The sink bowl usually “hangs down,” stealing height in the center.
- The back 2″–4″ are often blocked by the P-trap and water lines.
- Side walls can be taken up by pull-out trash, organizers, or a garbage disposal bracket.
For most customers, the realistic, usable under-sink cabinet space for a compact RO system for small kitchen cabinets is the left or right third of the cabinet, not the whole width.
How Plumbing Cuts Into Cabinet Capacity
Plumbing has a huge impact on standard cabinet compatibility for RO:
- P-trap position: A low or angled P-trap can block where a tall tankless unit wants to sit.
- Garbage disposal: A large disposal on one side shrinks the available footprint and can cause P-trap interference with RO installation.
- Angle stops: 3/8″ and 1/2″ angle stop valves plus flexible hoses often crowd the back wall where we’d like to place the RO housing.
This is why cabinet fit assessment for RO has to look at the plumbing layout, not just the cabinet size on paper.
Minimum Space for Tankless RO Compatibility
Most space-saving reverse osmosis systems designed for under-counter tankless water filter fit will work if you can meet some simple minimums:
- Height: Around 14″–18″ clear height in one section of the cabinet, measured under the sink bowl and P-trap
- Width: 6″–10″ of clear width for a slim vertical unit
- Depth: 12″–16″ from back wall to inside of the door for safe installation
These ranges cover most retrofit tankless RO for existing cabinets in American homes, but always compare to your specific model’s spec sheet.
Door and Drawer Clearance
Even if the RO body fits, the doors still need to close smoothly:
- Leave at least 0.5″–1″ between the front of the tankless RO and the back of the cabinet door.
- Check that hinges, pull-out trash rails, and any under-sink organizers don’t hit the RO housing.
- Make sure there is enough clearance for front-loading filter changes if your system uses a front panel design.
If your cabinet is already tight or you’re seeing signs you need a water filter but don’t have much room, these clearances become critical. Before you buy, a quick DIY cabinet measurement for RO system fit will save you from a bad install and help you choose the most retrofit friendly RO housing for your kitchen.
Critical Compatibility Factors for Tankless RO Retrofits
When I look at whether a tankless reverse osmosis system will actually fit under a standard kitchen cabinet, I focus on a few critical compatibility checks.
Physical footprint vs. cabinet opening
First, I compare the tankless RO footprint (height, width, depth) with the actual size of the cabinet opening, not just the cabinet box. Hinges, face frames, and center stiles all eat into usable under-sink clearance for a tankless RO, so the unit needs to slide through the door opening without forcing or tilting at extreme angles.Vertical vs. horizontal orientation
Most compact RO systems are designed to sit upright in a vertical orientation. I only consider a horizontal position if the manufacturer specifically allows it; laying a tankless RO on its side can cause leaks or performance issues. In most US kitchens, a vertical, slim-profile design works best with standard kitchen base cabinet dimensions.Depth clearance and door swing
I always leave at least 1–2 inches between the front of the unit and the back of the cabinet doors so nothing hits when you close them. This depth clearance is what makes or breaks an under-sink tankless RO fit, especially in shallow cabinets or when there are pull-out trash cans.Filter access and service space
With front-loading filter designs and integrated manifolds, I make sure there’s open space in front of the system so you can pull filters straight out without emptying the whole cabinet. If you care about maintaining high water quality and the strong contaminant removal you see in a well-designed reverse osmosis water filter, you need enough room to actually change those filters on schedule.Power and GFCI outlet requirements
Tankless RO units need a 110–120V outlet under the sink, ideally GFCI-protected. I never overload the existing garbage disposal or dishwasher circuit; instead, I confirm the amp rating and follow local code so the tankless RO system runs safely alongside other appliances.Plumbing connections and angle stops
Under-sink compatibility comes down to whether your angle stops are 3/8″ or 1/2″. Most retrofit-friendly tankless reverse osmosis systems include adapters for both sizes, but I still verify thread type, condition of the shutoff valves, and whether there’s enough room to add tees without clashing with the P-trap or garbage disposal.Drain saddle and P-trap interference
I place the drain saddle on a smooth, straight section of the drain pipe, above the P-trap, with enough vertical drop to prevent backflow into the RO drain line. If the P-trap is very low or crowded, I plan the layout first so the compact RO system and its drain tubing don’t kink or interfere with other under-sink plumbing.Ventilation and heat dissipation
Tankless RO systems generate a bit of heat, so I avoid wedging them tight against insulation, trash cans, or cleaning supplies. A little open space around the housing lets air move, which protects electronics and keeps performance steady in tight under-sink cabinet retrofits.
How to Measure Your Cabinet for a Tankless RO System
Getting the right under sink clearance for tankless RO is all about measuring smart, not guessing. Here’s how I tell homeowners and installers to do a quick cabinet fit assessment before buying.
Step 1: Measure Width, Depth, and Height (Clear of Obstructions)
Grab a tape measure and focus on usable under-sink cabinet space, not just the outside size.
- Measure inside width from side panel to side panel.
- Measure depth from the back panel to the inside of the cabinet doors (not just the front edge).
- Measure height from the cabinet floor to the bottom of the sink or garbage disposal.
Write down the “clear” space where a tankless reverse osmosis under-sink unit could actually sit without hitting pipes or the sink bowl.
Step 2: Map P-Trap, Valves, and Garbage Disposal
Most compatibility issues come from plumbing, not the cabinet itself.
- Note where the P-trap, drain lines, and garbage disposal sit.
- Mark shutoff valves and angle stops (3/8″ or 1/2″) on a simple sketch.
- Shade out any “no-go” areas that block the footprint of a compact RO system for small kitchen cabinets.
This makes it easy to see what space is truly free for a tankless RO system.
Step 3: Check Door Swing and Hinges
Under-counter tankless water filter fit isn’t just about depth; doors and hinges can kill a good layout.
- Open doors fully and check if hinges or center stiles will hit the RO unit.
- Make sure the planned position leaves enough room so doors close cleanly.
- If you have pull-out trash or organizers, slide them in and out and confirm they won’t crash into the RO housing.
Step 4: Use a Cardboard or Shoebox Mockup
A simple mockup is one of the easiest DIY cabinet measurement tricks for RO systems.
- Cut a cardboard box or use a shoebox close to your target unit’s height, width, and depth.
- Place it in different positions (center, side wall, back) to test cabinet layout compatibility.
- Check access to the front of the box to simulate future filter changes.
This “test fit” makes under sink clearance for tankless RO much easier to visualize.
Step 5: Plan Hose Routing to Faucet, Drain, and Angle Stops
Tankless RO installation in tight spaces depends on clean hose routing.
- Identify the shortest, least tangled path to the cold-water angle stop (3/8″ or 1/2″).
- Pick a drain location where a drain saddle can sit with enough vertical drop to prevent backflow.
- Keep tubing away from sharp edges, moving drawers, and trash pull-outs.
If you prefer zero under-sink equipment, you might also compare this with a countertop RO system option for very tight apartments.
Step 6: Check Faucet Hole Size and Location
Smart faucet compatibility with RO matters just as much as cabinet space.
- Measure your existing faucet hole (most RO faucets fit 1/2″–1 1/4″).
- Confirm there’s space between your main faucet, soap dispenser, and backsplash.
- Make sure the RO faucet location lines up with a clean hose path from the tankless RO unit without sharp bends.
Step 7: Confirm Space for Filter Changes and Maintenance
A retrofit-friendly RO housing needs room to breathe and be serviced.
- Leave at least a few inches in front of the unit for front-loading filter change design.
- Make sure you can pull filters straight out without removing trash bins or cleaning supplies every time.
- Check that there’s enough air around the system for basic ventilation and heat dissipation space, especially with high-output tankless units.
Once these seven steps check out, your cabinet is usually ready for a retrofit tankless RO system without major modifications.
Overcoming Common Layout Challenges in Standard Kitchen Cabinets
Fitting Tankless RO in Narrow Under-Sink Cabinets
Narrow base cabinets are where tankless reverse osmosis really shines. In tight 24″ or 30″ under-sink spaces, I focus on:
- Choosing a slim, vertical tankless RO system that keeps a small footprint and maximizes usable under-sink cabinet space.
- Pushing the unit to one side to keep room for garbage disposal and drain access.
- Checking under sink clearance for tankless RO so doors close cleanly and hoses don’t pinch.
Corner Cabinet and Island Sink Strategies
Corner and island sinks are always tricky for under-counter tankless water filter fit:
- For corner cabinets, I typically mount the tankless RO on the side wall, then route tubing across the back to avoid the P-trap cluster.
- With island sink tankless RO installation, I plan hose routing early so lines don’t kink around the long drain and limited venting.
- A quick cardboard mockup helps confirm cabinet fit assessment before you drill anything.
Dealing With P-Traps, Multi-Bowl Drains, and Organizers
Low P-traps, double-bowl sinks, and organizers can block prime real estate:
- When there’s P-trap interference with RO installation, I shift the unit to the back or side and keep a clean vertical drop for the drain saddle.
- On multi-bowl drains, I pick the branch with the best height and slope to prevent backflow.
- For pull-out trash or drawers, I keep the tankless RO tucked to the back wall so rails and bins move freely.
Side-Wall Mounting and Relocating Supplies
In really cramped kitchens, side-wall mounting a compact RO system for small kitchen cabinets is often the best move:
- Mount the tankless RO on the left or right panel to free up floor space for cleaning supplies.
- Re-aim or slightly relocate angle stops and hoses when needed to improve kitchen layout compatibility and avoid future leaks.
- When the plumbing layout is just too chaotic, I’d rather adjust supply locations once than fight constant clearance problems.
If you’re also thinking about pairing your under-sink setup with better faucet filtration, I’d look at using a dedicated filter water for sink solution alongside a tankless RO for maximum flexibility.
Why Tankless RO Systems Work Well in Standard Kitchen Cabinets
Tankless RO systems are built for real under-sink clearance issues, not showroom-perfect kitchens. In standard U.S. kitchen base cabinets, a compact, vertical tankless design almost always beats a bulky tank-style unit for fit and usability.
Integrated waterways = less clutter
Modern tankless reverse osmosis systems use integrated manifolds and internal waterways instead of a tangle of loose tubes.
- Fewer external lines running across the cabinet floor
- Cleaner layout around garbage disposals and P-traps
- Easier wipe-down and less chance of kinks or leaks
- Better use of usable under-sink cabinet space
If you’re also comparing with countertop units for tight apartments, it’s worth looking at a countertop vs under-sink water filter comparison to choose the right layout for your space.
Slim, vertical profiles for tight spaces
Tankless RO vs traditional tank RO footprint is not even close in most standard cabinets:
| Feature | Tankless RO (Typical) | Tank RO System (Typical) |
|---|---|---|
| Orientation | Vertical, tower-style | Horizontal tank + separate filters |
| Floor space used | Narrow strip along side or back wall | Large chunk of cabinet floor |
| Under sink clearance need | Mostly height | Height + big floor footprint |
A slim, vertical body lets you:
- Tuck the unit against the side or back panel
- Keep room for a pull-out trash can or cleaning supplies
- Work around standard kitchen base cabinet dimensions without custom carpentry
Front-loading filters = no cabinet emptying
A huge win for U.S. homeowners is front-loading filter access:
- Filters slide out the front of the unit
- No need to lift out trash bins, cleaners, or organizers
- Faster DIY maintenance for renters and busy families
- Much better fit in narrow doors where side access is blocked
This front-loading filter change design is what makes a tankless reverse osmosis under-sink fit practical in small kitchens.
Quick-connect fittings for easy retrofits
Tankless RO systems are usually designed as retrofit friendly RO housing:
- Quick-connect fittings for 3/8″ and 1/2″ angle stop connections
- Simple drain saddle hookup under the sink
- Cleaner under-counter tankless water filter fit with less cutting and drilling
- Faster installs for pros and confident DIYers
For installers, this means more jobs per day and fewer callbacks. For distributors, it reduces installation “fear factor” for end users.
Real space savings vs tank-based RO
Space-saving reverse osmosis system design is the core reason tankless wins in standard cabinet compatibility:
- No separate storage tank eating up half the cabinet
- Easier routing around P-traps, garbage disposals, and pull-out hardware
- Better under sink clearance for tankless RO in condos and apartments
- More flexibility in kitchen layout compatibility without redoing plumbing
OEM / ODM cabinet-specific designs
As a platform owner, I work closely with OEM and ODM partners to align residential cabinet standards with tankless RO housing:
- Slim bodies sized to common U.S. 30″ and 36″ sink base cabinets
- Side-wall mounting tankless RO system options for ultra-tight spaces
- Ventilation and heat management tuned for closed under-sink environments
- Retrofit-friendly layouts that avoid conflict with standard hinges and door swings
For installers and distributors focusing on small kitchens, these cabinet-specific models reduce install time, cut returns, and make it easier to standardize your offering across different housing types.
Frequently Asked Questions About Compatibility and Fit
Do tankless RO systems fit most standard kitchen cabinets?
Yes, most compact tankless RO systems are designed to fit standard U.S. base cabinets (typically 24″ depth and 30″–36″ width). As long as you have enough under sink clearance for tankless RO height and depth in front of the P-trap and garbage disposal, you’re usually fine. The key is to compare the unit’s footprint to your usable under-sink cabinet space, not just the overall cabinet size.
Do I need a plumber, or can I install a tankless RO myself?
Most homeowners can handle a DIY tankless reverse osmosis under-sink fit with basic tools, especially with quick-connect fittings and clear step-by-step instructions. That said, I always recommend hiring a plumber if:
- You’re not comfortable shutting off water or tapping angle stops
- Your cabinet layout is tight or non-standard
- You’re sharing circuits or modifying electrical under the sink
Can I lay a tankless RO system on its side inside the cabinet?
No. A tankless RO system must sit upright. The internal pump, sensors, and integrated manifold are designed for vertical orientation. Laying the unit on its side can cause leaks, noise, or damage and will usually void the warranty. If vertical space is an issue, choose a slim vertical design or a side-wall mounted compact RO system for small kitchen cabinets.
How much vertical and side clearance do I need?
Most tankless RO units need:
- Around 1″–2″ of space on each side for airflow and hose routing
- Enough vertical clearance to fully remove the front-loading filters straight down or out
If the top of the unit nearly touches the sink bottom or the side panels pinch it, it’s not a safe or service-friendly cabinet fit assessment for RO.
What if I don’t have an outlet under my sink?
You’ll need a GFCI-protected power source. Common options:
- Have an electrician add a dedicated GFCI outlet under the sink
- Convert the existing disposal outlet to a dual-outlet GFCI and plug both in (if the load allows)
Never run a loose extension cord through cabinets or across the floor; it’s not safe or code-friendly for under-sink power and plumbing planning.
Will a tankless RO work with my garbage disposal and existing plumbing?
Yes, in most kitchens. Tankless RO vs traditional tank RO systems typically play nicer with disposals because they use fewer loose tubes and no bulky tank. You’ll:
- Tie the drain line in with a drain saddle or disposal-compatible adapter
- Use the existing 3/8″ or 1/2″ angle stop connections for feed water
The main watchouts are P-trap interference with RO installation and making sure the drain saddle is above the P-trap with enough vertical drop to avoid backflow.
How do I know if my cabinet is too small for a tankless RO system?
Your cabinet may be too tight if:
- The unit’s depth is close to or greater than your usable depth in front of the doors
- The height of the RO plus filter removal space hits the sink bottom or disposal body
- You can’t open the door fully without hitting the front panel
When in doubt, I recommend doing a quick DIY cabinet measurement for RO and mocking up the footprint with a cardboard box. For OEMs and installers, pairing compact, auto-flush tankless designs with the right cabinet layout can also help with long-term reliability and membrane longevity and performance.
Fit Readiness Checklist for Tankless RO in Your Kitchen Cabinet
Before you buy, I want you to be 100% sure your cabinet is actually ready for a tankless reverse osmosis system. Use this quick fit readiness checklist so you don’t end up returning equipment or re-doing plumbing later.
Space Checklist: Height, Width, and Depth
For standard kitchen cabinet compatibility with a tankless RO system, I look for:
- Clear width: At least 10–12″ of open space side to side after accounting for the garbage disposal, P-trap, and pull-out trash.
- Clear height: Minimum 16–18″ of vertical clearance for most compact RO systems, with a few extra inches so you can slide the unit in and out.
- Clear depth: At least 16–18″ from the back wall to the inside of the cabinet door; confirm the door closes without touching the unit.
- Under sink clearance for tankless RO: Make sure no shelf lips, support rails, or organizer hardware block the bottom few inches where the unit will sit.
If your cabinet can’t hit these numbers, that’s a red flag that the cabinet fit assessment for RO will be tight or need modifications.
Power and GFCI Outlet Checklist Under the Sink
Tankless RO systems need safe, reliable power under the sink:
- GFCI protection: Confirm you have a GFCI outlet in the base cabinet or on the same circuit as required by local code.
- Dedicated outlet preferred: Avoid overloading the same outlet that runs your garbage disposal or dishwasher unless the circuit is sized correctly.
- Cord reach: Check that the RO power cord can reach the outlet without stretching across sharp edges or hot pipes.
- Dry zone: Outlet and plug must stay away from any known leak points or drain joints.
If you’re not sure your under-sink GFCI setup is right, talk to an electrician before you plug in a tankless RO.
Plumbing and Drain Connection Checklist
To keep installation clean and reliable in standard cabinets, I confirm:
- Angle stop size: You have 3/8″ or 1/2″ angle stop valves for cold water; adapters are available but you want a solid base to start from.
- Shutoff valves work: Test that you can fully close the cold water valve before installing any retrofit RO housing.
- Drain saddle placement: There’s a straight drain section with enough vertical drop for the drain saddle, above the P-trap, so you avoid backflow and gurgling.
- P-trap interference: Make sure the RO drain tubing won’t fight for space with the P-trap or disposal discharge tube.
- Clean faucet area: The sink or countertop has a free hole (or space to drill one) sized correctly for a smart RO faucet; if you’re weighing faucet styles, it helps to know the types of sink faucets with filters and their benefits.
This is where under-sink power and plumbing planning pays off. Ten minutes of measuring here saves an hour of frustration later.
Red Flags That Point to Cabinet Modifications
I’d seriously reconsider or plan for changes if you see:
- Super narrow doors: Openings under 11–12″ wide where you can’t physically angle the tankless RO system through the door.
- Low, centered P-trap: A trap that sits very low and takes up the whole width, leaving no clear vertical wall space.
- Packed layout: Pull-out trash cans, sliding organizers, or deep drawers that already use most of the base cabinet depth.
- No outlet at all: Zero under-sink power and no easy way to extend a circuit.
- Severe moisture history: Past leaks, swollen cabinet floors, or mold that may not support mounting or long-term appliance use.
When these show up, you’re beyond a simple tankless RO vs traditional tank RO decision—you’re in light remodeling territory.
When to Contact a Pro or the Manufacturer
Bring in help when:
- You’re unsure about the electrical load or GFCI requirements for the RO system.
- You have complex layouts (corner cabinets, island sinks, old plumbing, or stacked appliances).
- The cabinet is tight and you’re not confident about under sink clearance for tankless RO units.
- You’re planning a wider kitchen layout compatibility upgrade and need a long-term solution, not just a quick add-on.
A quick call with a local installer or the manufacturer’s tech team can confirm fit, suggest retrofit-friendly RO housing options, and keep you from ordering the wrong system for your space.