












Tools and Materials You’ll Need
Before you start your under sink water filter installation, make sure you have the right tools and parts ready. Here’s what you’ll need for a smooth, no-fuss setup:
Standard Tools
- Adjustable wrench – for tightening fittings without damaging them
- Screwdriver – usually Phillips-head, to secure mounting brackets and faucet
- Teflon tape – to ensure leak-free threaded connections
- Bucket and towel – to catch drips and keep the cabinet dry during installation
Included driplife System Parts
- Quick-connect fittings – John Guest®-style push-to-connect fittings that make hooking up tubing a snap
- Color-coded tubing – clearly marked lines for water inlet, outlet, and drain, so wiring is foolproof
- Dedicated faucet – compact faucet designed specifically for under sink systems
- Mounting bracket – sturdy wall mount to keep your filtration system secure and organized
Optional But Helpful Tools
- Tubing cutter – clean, precise cuts on tubing for tight seals and a professional finish
- Drill with appropriate bit – if you need to install the dedicated faucet and your sink or countertop doesn’t have a pre-drilled hole
Having these tools and parts on hand before you begin will save you time and help guarantee a leak-free, reliable installation. Plus, the driplife system’s pre-assembled, color-coded components are designed to make this task easier—no plumber required!
Preparation and Safety First
Before starting your under sink water filter installation, the first step is to locate and shut off the cold water supply valve. This is usually found under the sink, near the pipes. Turning off this valve stops water flow and prevents leaks during installation.
Next, relieve any pressure in the water line by opening the existing faucet and letting the water drain completely into a bucket or towel. This also helps avoid spills when disconnecting pipes.
Make sure to measure the cabinet space carefully before you begin. Driplife’s compact models require a minimum cabinet size to fit comfortably, so confirm you have enough room for the system and the dedicated faucet.
Finally, clear out everything from under the sink and place a towel or waterproof mat on the cabinet base to protect it from any accidental drips or spills. Taking these preparation steps will ensure a smooth, safe, and efficient installation process.
For additional insights on choosing the right fittings for your setup, check out our guide on choosing the right PUR water filter faucet adapter.
Step-by-Step Installation Process
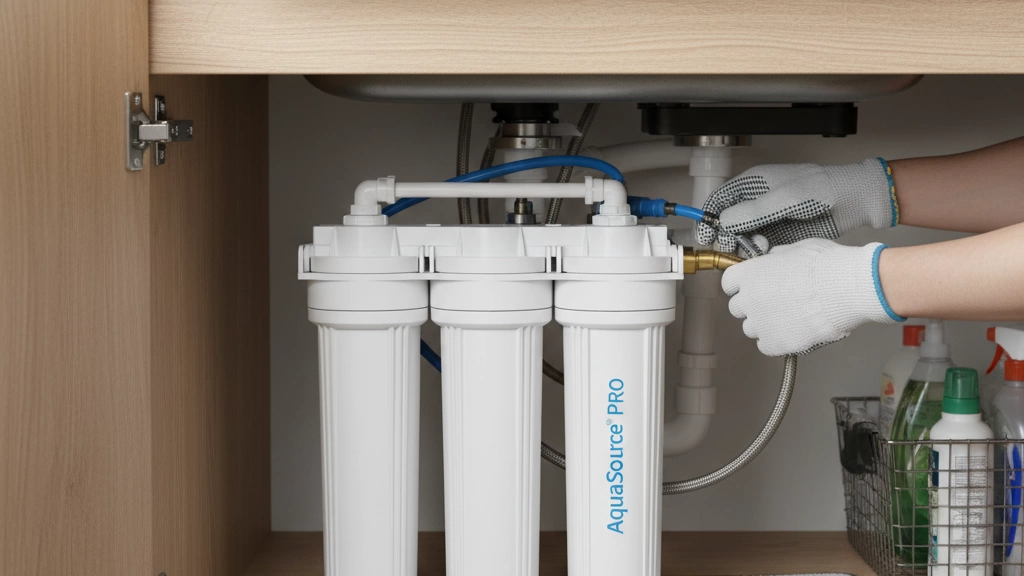
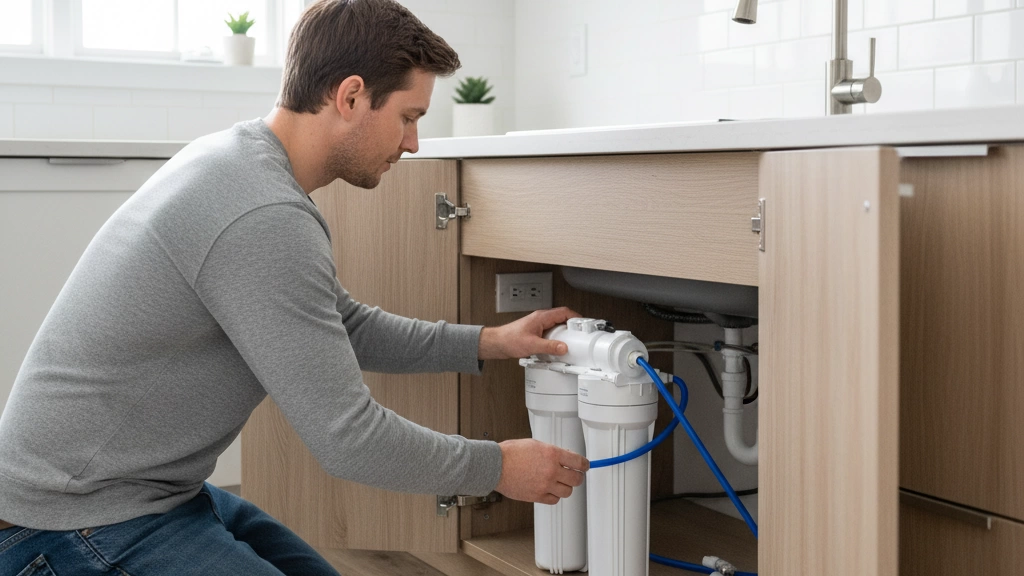
Installing your under sink water filter is straightforward when you follow these steps carefully:
Mount the Filter System
Start by securing the filter system to the cabinet wall using the provided mounting bracket. Choose a spot with enough clearance and easy access for future filter replacements.
Install the Dedicated Faucet
Drill a hole in your sink or countertop if needed, then install the dedicated water filter faucet. Some setups offer a 3-way faucet option, combining filtered, hot, and cold water for added convenience.
Connect the Feed Water Adapter
Attach the feed water adapter to your cold water supply line. Make sure this connection is tight to prevent leaks. Turn off the water supply valve before doing this step.
Attach Tubing to Inlet, Outlet, and Faucet
Use the color-coded push-fit connectors to connect the tubing to the system’s inlet, outlet, and faucet. These quick-connect fittings make installation fast and tool-free, helping you avoid cross-threading or kinking.
Connect the Drain Saddle (RO Systems Only)
If you have a reverse osmosis system, install the drain saddle on the sink drainpipe to handle wastewater from the filtration process. Position it properly to prevent leaks and ensure smooth drainage.
Route and Secure Tubing
Finally, route the tubing neatly inside the cabinet, avoiding sharp bends or kinks, and secure it with the clips included. This keeps the installation clean and prevents accidental disconnections.
Following this process ensures a secure, leak-free installation and proper functionality of your under sink water filter. For more details on under sink water filter installation and features, you can check out the driplife under sink RO system page.
Flushing the System and First-Use Testing
Flushing your new under sink water filter is a critical step to get the best water quality right away. It removes leftover carbon fines and any particles from manufacturing that might cause cloudy water or odd taste. For driplife systems, we recommend flushing the filter for about 5 to 10 minutes or until around 2 to 3 gallons of water have passed through the system.
Here’s the exact steps for flushing and testing your driplife filter:
- Run cold water through the dedicated faucet continuously for 5 to 10 minutes. This clears out any residual carbon dust.
- Check every connection carefully for leaks while flushing. Tighten fittings or re-seat tubing if you spot drips.
- After flushing, test the water flow rate to confirm normal pressure and steady flow.
- Finally, taste the water to ensure it’s clean, fresh, and free of any plastic or chemical tastes common right after installation.
Following these steps ensures your under sink water purifier setup delivers the best water quality from day one. For more insights on preventing common water quality issues, you can also check driplife’s guide on health risks and reasons to avoid UK tap water, which highlights why proper filtration and flushing matter.
Common Installation Mistakes and How to Avoid Them
When installing your under sink water filter, avoiding common mistakes can save you time and headaches.
- Cross-threading the feed valve adapter: Always start threading by hand to ensure it lines up properly. Forcing a misaligned connection can damage fittings and cause leaks.
- Kinking tubing: Keep the color-coded tubing straight and avoid sharp bends, which restrict water flow and reduce filter performance.
- Forgetting Teflon tape on threaded fittings: Always wrap Teflon tape clockwise around threaded parts to create a watertight seal and prevent leaks.
- Incorrect drain saddle placement: Position the drain saddle on the vertical side of the drainpipe, avoiding screws near pipe joints or clamps to ensure proper drainage.
- Not flushing long enough: Many skip thorough flushing, but it’s critical to clear out carbon fines and debris. Don’t worry about the “cloudy ice cubes” myth—flushing thoroughly ensures clean water from the start.
Following these simple tips will help you achieve a leak-free installation and ensure your under sink water purifier setup runs smoothly from day one. For more tips on maintaining clean water, consider combining your system with options like a UV water sterilizer for extra peace of mind.
Maintenance and Cartridge Replacement Schedule
Driplife filters typically last between 6 to 12 months, depending on your water quality and usage. Keeping up with timely cartridge replacements ensures your under sink water filter continues delivering clean, fresh water without a drop in performance.
One of the best features of driplife systems is the tool-free cartridge replacement, which takes less than 2 minutes—no plumber or complicated steps needed. Just twist out the old filter and snap in a new one.
Many models come with visual change indicators to remind you when it’s time to replace the cartridge. For added convenience, driplife also offers a smart reminder app that tracks filter life based on your specific usage.
When compared to bottled water, driplife’s cost per gallon is significantly lower, making it an affordable and eco-friendly choice for your home or office hydration needs.
For more detailed information on setting up your system, check out our under-counter water filter setup guide.
Troubleshooting Quick Reference
Running into issues after your under sink water filter installation? Here are quick fixes to keep things flowing smoothly:
- Low Water Pressure: Check if tubing is kinked or pinched. Make sure the shutoff valve is fully open. Sometimes sediment buildup in the filter cartridge can reduce flow, so consider replacing the cartridge if it’s been a while.
- Noisy Faucet or Slow Flow: Air trapped in the lines often causes faucet noises. Run water through the system for a few minutes to flush out air. Also, ensure inlet and outlet tubing are connected securely without bends that restrict flow.
- Minor Leaks: Tighten any loose fittings by hand first, then use an adjustable wrench if needed. Check that Teflon tape is applied on threaded connections to prevent leaks. If a quick-connect fitting leaks, disconnect and reconnect firmly to ensure a proper seal.
- When to Call Support: If leaks persist, water pressure stays low after troubleshooting, or if you face unusual noises that don’t resolve after flushing, reach out to driplife’s 24/7 support via WhatsApp or WeChat. Their expert team is ready to help you resolve installation hiccups quickly.
For detailed support and easy access to resources, driplife’s customer service is just a message away, making your DIY under sink filtration system hassle-free and reliable.
Why driplife Makes Installation Easier Than Any Other Brand
driplife stands out thanks to its true push-to-connect John Guest®-style fittings, which mean no extra tools are needed to secure tubing. The pre-assembled components and color-coded tubing make it simple to match connections quickly and correctly, cutting down installation time and avoiding guesswork.
Its ultra-compact design fits in 99% of standard under-sink cabinets, making it ideal for both tight spaces and larger setups. Every system includes a detailed video guide with a handy QR code right in the box, so installers can follow along step-by-step without hassle.
Plus, driplife offers OEM/ODM capabilities tailored for private-label partners, with competitive bulk pricing that benefits businesses looking to scale. This factory-direct approach ensures you get quality parts and smooth installation, whether you’re a DIYer or a professional installer.
For more info on factory-quality water filtration, check out driplife’s water purifier suppliers page.
Who Should Consider Professional Installation?
While many can handle an under sink water filter installation on their own, there are times when hiring a pro makes sense:
- Renters with strict lease rules: If your lease forbids permanent changes like drilling or altering plumbing, a professional can help install without violating terms—or recommend renter-friendly options.
- Very old plumbing (galvanized pipes): Older homes with galvanized pipes often need specialized fittings or pipe replacements to avoid leaks and corrosion. A licensed plumber knows how to handle these safely.
- Commercial kitchens or offices needing 50+ units: Large-scale setups require precise planning, mounting, and water pressure balancing. Professionals ensure smooth installation and ongoing support for multiple units.
For those unsure about their plumbing or complex setups, opting for professional installation ensures a leak-free, code-compliant system that works great from day one. If you want to explore how faucet-mounted water purifier principles fit into your setup, check out our detailed guide on the principle behind installing a water purifier on a faucet.