













Understanding Hi-Low Drinking Fountains and ADA Basics
When we talk about ADA hi-low drinking fountain compliance, we’re really talking about one core goal: making sure both wheelchair users and standing users can drink comfortably and independently, without relying on staff or “work-arounds.”
What is a Hi-Low (Bi-Level) Drinking Fountain?
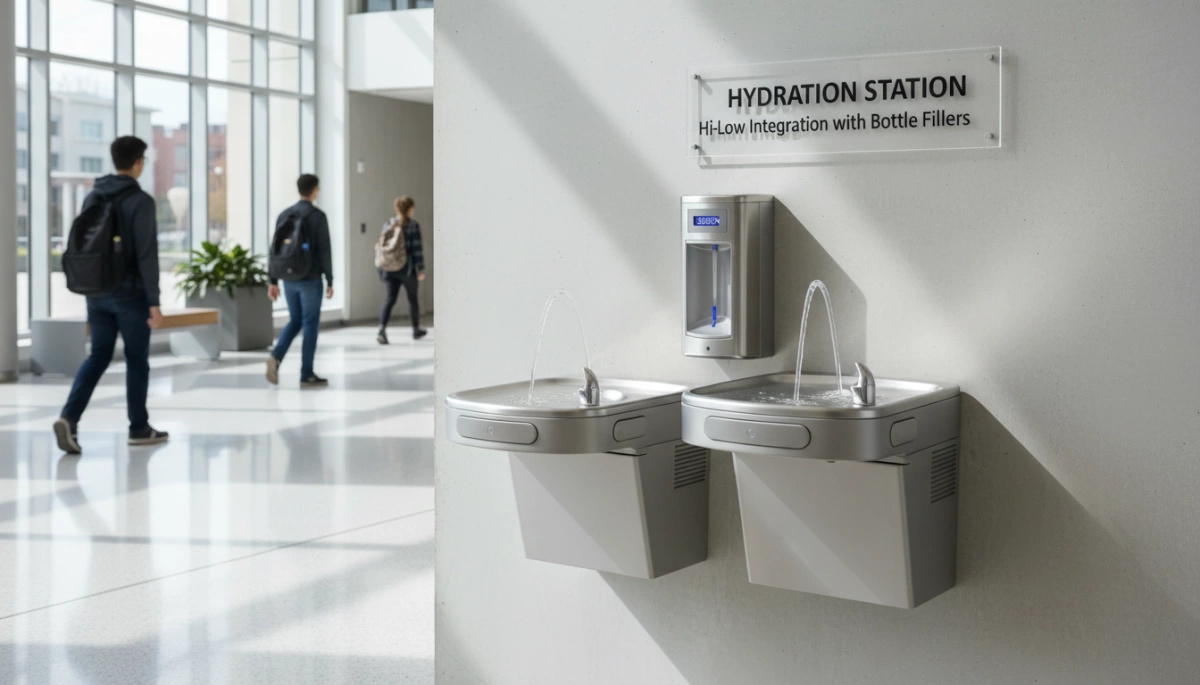
A hi-low drinking fountain (also called a bi-level drinking fountain) is a dual-height unit that combines:
- One wheelchair-height low unit
- One standing-height high unit
That dual height is what lets us meet ADA and plumbing code requirements in one compact “dual height hydration station.”
Typical configuration:
| Component | Purpose | Typical User |
|---|---|---|
| Low drinking fountain | Wheelchair access, children | Seated / shorter users |
| High drinking fountain | Standing adults, people who can bend | Taller / standing users |
Role of the Low and High Units
A compliant ADA hi-low drinking fountain must serve both groups:
Low (wheelchair-accessible) unit
- Provides knee and toe clearance below.
- Spout and controls must fall within ADA reach ranges.
- Intended for wheelchair users, children, and anyone who can’t comfortably reach the higher spout.
High (standing) unit
- Serves most adults who walk.
- Reduces crowding at the low unit.
- Helps meet the “serving all users” expectation in public spaces.
You need both; one height alone rarely satisfies real-world use.
ADA 2010 §211: Minimum Number of Drinking Fountains
Under the 2010 ADA Standards §211, when drinking fountains are provided:
- At least 50% of required fountains must be wheelchair accessible (low units) per §602.1.
- The remaining fountains must be for standing users.
In practice, that’s why you see a dual height drinking fountain ADA layout: one accessible, one standing-height.
ADA 2010 §602: Technical Requirements
Section §602 outlines the technical specs for an ADA accessible drinking fountain, including:
- Spout height and location
- Water flow direction
- Knee and toe clearances
- Clear floor space for wheelchair approach
This is the section you design against when you size and lay out a hi-low ADA hydration station.
Required Spout Heights for Low and High Units
Key height targets you should know:
| Fountain Type | ADA Spout Height (to outlet) |
|---|---|
| Low wheelchair-accessible fountain | ≤ 36 inches above finish floor (AFF) |
| High standing fountain | Typically 38–43 inches AFF (not specified in ADA, but commonly used to serve adults comfortably while still avoiding protrusion issues) |
Other important points:
- Spout must be within 5 inches of the front edge of the unit for the accessible low station.
- Water must flow in a nearly parallel path to the front edge, not straight up.
Why Bottle Fillers Do Not Replace Drinking Fountains
A bottle filler is not a drinking fountain in the eyes of ADA or most plumbing codes.
- A bottle filling station is considered an accessory or an operable part, not a substitute for the required drinking fountain fixture.
- Even with a hi-lo bottle filling station:
- You still need a compliant low drinking fountain with a spout.
- You still need a standing-height fountain for upright users.
You cannot meet §211 by installing only bottle fillers, even if they are at accessible heights.
Hi-Low Fountains vs Single-Height Hydration Stations
It’s easy to confuse the options, so here’s the distinction:
| System Type | Description | Typical Use Case |
|---|---|---|
| Hi-low drinking fountain | Two spouts, two heights (low + high) | Core ADA and plumbing code compliance |
| Single-height hydration station | One height, usually with bottle filler + 1 spout | Supplemental, may not meet all ADA needs |
| Bottle filler only (no fountain) | Water for bottles only, no direct drinking spout | Never a substitute for required fountains |
If you only install a single-height hydration station (even with a bottle filler), you risk failing both ADA and local plumbing requirements where an ADA hi-low drinking fountain is expected.
Where Hi-Low Drinking Fountains Are Common
Most of the facility pros I work with deal with the same types of locations:
- Schools and universities – corridors, gyms, cafeterias.
- Offices and corporate campuses – break rooms, elevator lobbies, collaboration spaces.
- Hospitals and clinics – public corridors, waiting areas, staff zones.
- Public facilities – libraries, community centers, transit hubs, airports, arenas.
In all of these, a dual height hydration station with both a hi-low fountain and optional bottle filler is the most reliable path to dual level ADA compliance and smooth inspections.
Key ADA Requirements for Bottle Filling Stations
When I design or spec an ADA hi-low drinking fountain with a bottle filler, I treat the bottle filler as a full “control point” under ADA, not an accessory. That’s what keeps the whole dual height hydration station compliant.
Bottle Fillers as ADA Operable Parts (§309)
Under ADA §309, bottle filling modules are operable parts, just like push buttons and levers:
- Must be usable with one hand
- No tight grasping, pinching, or twisting of the wrist
- Max operating force: 5 pounds (22.2 N) for buttons, paddles, or sensor overrides
- Sensor-activated units are fine, as long as any manual controls also meet operable-part rules
Reach Range and Control Height
For ADA accessible bottle filler placement, I always check reach ranges first:
| Type of Reach (Wheelchair) | ADA Range (from finished floor) | Notes |
|---|---|---|
| Forward reach (unobstructed) | 15″ min – 48″ max | Ideal for most touchless bottle fillers |
| Side reach (unobstructed) | 15″ min – 48″ max | Wall-hung units along a clear side approach |
| Forward reach over obstruction | Depends on depth; often 44″ max if 20–25″ deep | Avoid deep ledges under filler |
| Side reach over obstruction | 15″–46″ typical | Keep shelves and housings shallow |
Key points for a wheelchair accessible drinking fountain with bottle filler:
- Controls, sensors, and manual buttons must fall within reach range
- Water outlet / bottle neck area should be reachable without stretching or leaning dangerously
- Avoid mounting fillers so high they only serve standing users
Clear Floor Space and Maneuvering
In front of hi-low drinking fountains and bottle fillers, I always maintain:
- 30″ x 48″ minimum clear floor space centered on the accessible low unit
- Floor space aligned for either front or parallel approach by a wheelchair
- Clear space connecting to an accessible route (no steps, tight turns, or level changes)
For tight corridors, I also look at turning and passing:
- Maintain 36″ minimum clear width along the path (more in busy schools or hospitals)
- Avoid trash cans, bottle crates, or janitorial items blocking access to the ADA hi-low drinking fountain
Projection Limits (4-Inch Rule) and Recessed Installations
Bottle filling stations are often mounted in hallways, so the 4-inch protrusion rule is critical:
- In circulation paths, objects between 27″ and 80″ above the floor can’t project more than 4″ into the route
- If a hi-lo bottle filling station sticks out too far:
- Use recessed or semi-recessed units
- Or pull the fountain into an alcove to keep the main corridor clear
I choose recessed bottle fillers when:
- Corridor width is tight (common in older public buildings)
- The unit would otherwise exceed 4″ projection
- The location is part of an egress path or high-traffic route
Prioritizing the Low Accessible Unit
For ADA hi-low drinking fountain + bottle filler combos, this is my rule:
- At least one bottle filler must be fully accessible at the wheelchair-height (low) unit
- Controls and spout on that filler must meet:
- Reach range limits
- Operable-part requirements
- Clear floor space and approach clearances
Adding a second filler over the high unit is optional and is usually driven by volume (busy schools, gyms, airports). But placing the only bottle filler over the high fountain is a common violation I avoid.
Coordination with ICC A117.1 and Local Codes
I always align designs with:
- 2010 ADA Standards (§309, §602)
- ICC A117.1 for detailed dimensions (knee/toe clearance, slopes, reaches)
- Local amendments that can be stricter (e.g., California, New York, certain city accessibility codes)
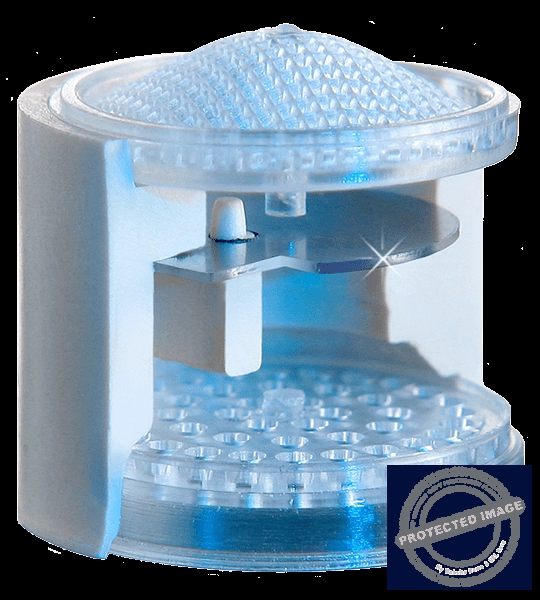
On top of ADA layout and control placement, I usually pair compliant layouts with strong water quality solutions. For example, adding filtration or UV-C LED sterilization in bottle fillers—like the type of UV-C LED dose and dwell-time designs used in advanced bottle filling systems—helps facilities in the U.S. deliver safe, high-quality water without sacrificing accessibility.
Integration Compliance When Adding Bottle Filling Modules to Hi-Low Fountains
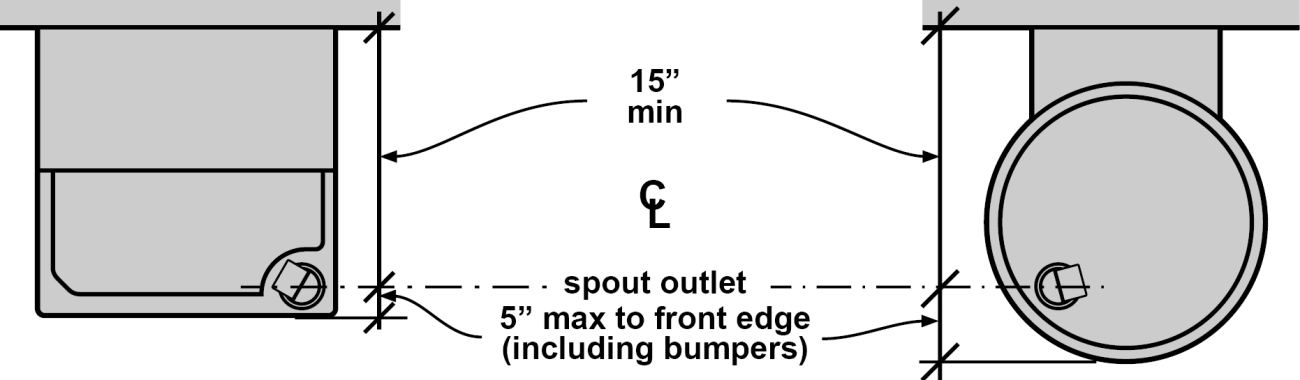
When I integrate bottle filling modules into an ADA hi-low drinking fountain, I treat it as both an accessibility issue and a code issue. Here’s how I keep it compliant and practical.
New Install vs. Alteration (ADA §202)
| Situation | What It Usually Means Under ADA §202 |
|---|---|
| Brand-new dual height hydration station | Full current ADA/ICC A117.1 compliance required |
| Adding bottle filler to existing hi-low | “Alteration” – must be made accessible to the max extent feasible |
| Major wall/finish rebuild | May trigger path-of-travel upgrades (signage, doors, routes) |
If the work is more than a simple add-on (cutting walls, moving units, major plumbing), I assume the path of travel to the station must also be checked and upgraded as needed.
When Bottle Fillers Trigger Path-of-Travel Upgrades
Adding a hi-low bottle filling station can trigger upgrades when:
- You relocate the fountain or significantly alter the alcove.
- You widen or rebuild the corridor niche.
- You reroute plumbing/electrical requiring wall reconstruction.
In those cases, I review routes from the accessible entrance, plus door hardware, slopes, and clearances along that path.
Check Existing Hi-Low Fountain Compliance First
Before I touch anything, I verify that the hi-low ADA hydration station meets the basics:
- Low unit spout height (typically max 36″ AFF) and knee/toe clearance.
- High unit height for standing users.
- Clear floor space (30″ x 48″) centered on the low fountain.
- No excessive projection into the corridor.
If the base fountain isn’t compliant, I fix that first; adding a bottle filler on a non-compliant base just creates more problems.
Best Placement: Bottle Filler Over the Low Accessible Unit
For ADA accessible drinking fountain retrofit work, I almost always:
- Place the primary bottle filler over the low wheelchair-height fountain.
- Keep its spout and sensor within reach range (usually 15″–48″ AFF for forward approach).
- Align the bottle target area so a seated user can center a bottle without stretching.
This avoids the common mistake of putting the only bottle filler over the high unit, which leaves wheelchair users with no comparable access.
Don’t Block the Low Fountain Spout
When I mount a hi-lo bottle filling station:
- I keep the filler body high enough and far enough back so the low spout is still usable.
- I avoid shrouds or covers that force a user to twist or lean to reach the bubbler.
- I verify the water trajectory is still aligned and unobstructed.
If the bottle filler frame crowds the user’s knees or the spout, I adjust height or choose a slimmer module.
Maintain Spout Height and Reach Ranges
After integration, I re-check:
- Low fountain spout height (still within ADA limit).
- Bottle filler control & sensor height within reach range.
- Forward reach without requiring tight pinching, grasping, or twisting.
Any change in wall thickness, added finish, or trim can push these dimensions off, so I measure after installation, not just on paper.
Choosing Integrated Hi-Low Fountain + Bottle Filler Combos
For new work, I prefer factory-built ADA hi low drinking fountain bottle filler combos because:
- Spout heights, reach ranges, and clearances are engineered into the unit.
- Structural support, plumbing manifolds, and electrical provisions are already coordinated.
- It simplifies inspection and documentation since the unit is marketed as ADA compliant.
Using Add-On Bottle Fillers on Existing Frames
On retrofits, I use ADA accessible bottle filler retrofit kits that:
- Match the brand/model of the existing hi-low water cooler.
- Mount to existing brackets or use simple reinforcement.
- Provide sensor-based, low-force operation.
I also plan adequate power supply—ideally on a protected circuit with proper regulation similar to how we design pressure-regulated dispensing systems for consistent performance.
Coordinate Electrical, Plumbing, and Wall Support
To keep the installation solid and code-compliant, I make sure:
- Wall backing can support the combined weight of fountains + filler + full use.
- Electrical is located so it doesn’t interfere with knee space or ADA clearances.
- Drain and supply lines are accessible for maintenance and don’t obstruct the clear floor space.
Avoid Common Violations
I specifically avoid:
- Placing the only bottle filler over the high unit.
- Creating a projection over 4″ into the corridor above 27″ AFF.
- Mounting controls outside reach range or requiring two hands.
- Blocking maneuvering space with new trim, cabinets, or trash receptacles.
Document Compliance Decisions
For each dual height drinking fountain ADA compliance project, I keep:
- Dimensioned photos or as-built drawings (heights, projection, clearances).
- Manufacturer cut sheets showing ADA features.
- Notes on how ADA §202 and local code were applied.
That way, when inspectors or facility teams have questions, I can show exactly how the hi low ADA hydration station integration spec was met.
Retrofit Considerations for Existing Hi-Low Drinking Fountains
Retrofitting an existing ADA hi-low drinking fountain with a bottle filler is absolutely doable, but you need to treat it like a small code project, not a quick hardware swap.
1. Site Assessment and Measurements
Start with a basic field survey:
- Measure spout heights for both the low (wheelchair) and high units and confirm they fall within ADA ranges.
- Check knee and toe clearance under the low unit so wheelchair users can roll in properly.
- Verify clear floor space (at least 30″ x 48″) in front of the hi-low ADA hydration station so users can approach and turn safely.
- Note corridor width and doors nearby so you don’t create a new conflict with egress.
2. Wall Depth, Backing, and Utilities
Before choosing a hi-low bottle filler combo:
- Confirm wall depth and backing can carry the added weight of a retrofit bottle filler and any filtration.
- Locate existing plumbing and electrical; many touchless retrofit kits need power, and rerouting lines can blow up your budget if you don’t plan ahead.
- In tight walls, look for slim or semi-recessed units to stay within ADA projection limits (no more than 4″ into the circulation path).
3. Choosing an ADA Accessible Retrofit Bottle Filler
When selecting an ADA accessible bottle filler retrofit kit:
- Confirm the controls and sensor fall within ADA reach ranges when mounted above the low fountain.
- Make sure the operable parts don’t exceed 5 lbs of force and can be used with one hand.
- Check manufacturer templates against your actual measurements to avoid surprises on install day.
- If you want better taste and user satisfaction, match your retrofit kit with integrated filtration or a compatible system, similar to how we design high-efficiency filtration in our smart water purification solutions.
4. Coordination With Operations
You don’t want to shut down a busy corridor:
- Schedule work during off-hours or school breaks.
- Keep at least one accessible drinking fountain in the area operational at all times.
- Use temporary signage so people can find alternate water sources during the retrofit.
5. Maintaining Dual-Height Functionality
ADA dual-level compliance means you keep both heights:
- Prioritize the bottle filler over the low, accessible unit so wheelchair users can actually use it.
- Only add a filler over the high unit as a secondary option, not the only one.
- Make sure the retrofit doesn’t block or crowd the existing low spout or knee space.
6. Filtration and Maintenance Access
When integrating filtration during a retrofit:
- Place filters, shutoff valves, and power where maintenance teams can reach them without crawling.
- Avoid designs that require removing the entire fountain just to change a filter.
- Confirm the retrofit doesn’t block access to panels, drains, or internal components needed for service.
7. Cost-Effective Retrofit Strategies
To control cost and avoid full replacement:
- Use modular add-on bottle fillers that mount to existing hi-low frames.
- Reuse current rough-ins and power where possible.
- Focus on upgrades that fix ADA issues (reach, projections, operable parts) instead of cosmetic changes.
8. Post-Installation Verification
Once the retrofit is in:
- Re-check reach ranges for the bottle filler controls and spout.
- Confirm wall projections still meet the 4″ rule in corridors.
- Test hands-free sensors and manual buttons to ensure they meet ADA operable-part requirements.
- Verify clear floor space is still usable and not blocked by new trim or panels.
9. Retrofit Checklist for Teams
I always recommend a simple, repeatable checklist for contractors and facility managers:
- [ ] Spout heights (high and low) confirmed
- [ ] Knee/toe clearance and clear floor space verified
- [ ] Wall structure, plumbing, and power checked
- [ ] Retrofit kit compatibility confirmed (templates matched)
- [ ] Bottle filler located over low accessible fountain
- [ ] Filtration and service access planned
- [ ] Projections and reach ranges measured after install
- [ ] Operable parts and sensors tested for accessibility
When you treat your ADA hi-low drinking fountain bottle filler combo as a structured retrofit project instead of a one-off install, you stay compliant, avoid rework, and give users a much better hydration experience.
Manufacturer Recommendations and Driplife Solutions for Hi-Low Integration
Key Features in ADA Hi-Low Drinking Fountain + Bottle Filler Combos
For ADA hi-low drinking fountain and bottle filler combos, I always focus on a few core specs:
- True hi-low configuration: One wheelchair-height unit (low) and one standing-height unit (high), both usable at the same time.
- ADA spout and control placement: Bottle filler and fountain controls within ADA reach ranges, with clear floor space in front.
- Low projection profiles: Especially in corridors, the full combo should respect the 4″ max wall projection where required.
Hands-Free Bottle Filling and Touchless Controls
Hands-free operation is now the expectation in schools, offices, and healthcare:
- Sensor-activated bottle fillers help wheelchair users and kids who can’t easily press small buttons.
- Automatic shutoff prevents overflow and reduces waste.
On our side, we design our bottle-filling station modules with responsive sensors that still stay within ADA operable-part rules (one-hand use, light force where manual buttons are used).
Flow Rates and Rapid-Fill Performance
In busy US facilities, slow bottle fillers become a problem fast. For dual height hydration stations, I typically recommend:
- Fast fill rate (around 1.0–1.5 GPM) for standard 16–24 oz bottles.
- Smart flow control to keep a steady stream even with fluctuating building pressure.
The goal is: fill a standard bottle in just a few seconds, not half a minute.
Integrated Filtration and Certified Water Quality
Most facility managers now expect filtration built into the hi-low ADA hydration station:
- NSF-certified filters for taste, odor, chlorine, and particulate reduction.
- Filter life indicators visible at wheelchair height.
- Easy front access so maintenance doesn’t have to disassemble the station.
Driplife can also pair integrated filtration with separate external filtration if a building already uses central treatment, and we’re happy to coordinate that layout.
Hygienic and Antimicrobial Design
High-touch areas on dual height drinking fountains take a beating:
- Antimicrobial surface treatments on push pads and bezels.
- Smooth, low-crevice design to avoid dirt and biofilm buildup.
- Splash-minimizing spout geometry to reduce pooled water and bacteria risk.
We build our faceplates and bottle filler housings with easy-wipe contours so daily janitorial teams in US schools and offices can clean them quickly and thoroughly.
Custom Hi-Low + Bottle Filler Configurations by Driplife
Where we add real value is in customizing ADA hi-low hydration stations around your site:
- Custom frame widths and heights to fit tight alcoves or non-standard wall openings.
- Choice of bottle filler location (typically centered over the low accessible unit) while keeping the high unit available for standing users.
- Optional add-on high-unit filler where traffic volume demands two fill points.
If you’re dealing with existing walls, we can adjust dimensions, mounting brackets, and access panels to match your site conditions.
Driplife Retrofit Modules for Existing ADA Hi-Low Fountains
If you already have a bi-level ADA drinking fountain installed, a full replacement isn’t always necessary:
- Retrofit bottle filler modules that mount above the low accessible fountain without blocking the low spout.
- Adapter kits designed to work with common US brands and frame openings.
- Optional filtration add-ons to upgrade quality and user perception without changing the original fountain bodies.
This approach cuts cost, avoids major demo, and keeps your existing ADA hi-low configuration intact.
Manufacturer Support on ADA and Code Questions
Local inspectors and plan reviewers can interpret ADA and building codes differently. We help you navigate that:
- Shop drawings with ADA dimensions (spout height, control height, projections, clearances) clearly called out.
- Coordination with ICC A117.1 requirements where your jurisdiction uses them.
- Pre-submittal consultation with your architect, GC, or facility engineer.
The aim is to get your dual height hydration station approved on paper before you open up the wall.
Example Dual Height Hydration Layouts
Here are a few typical layouts we support:
- School corridor alcove: Recessed hi-low fountain with bottle filler centered over the low unit, integrated filtration, minimal projection into egress path.
- Office break area: Surface-mounted hi-low combo with touchless filler and filtered cold-water service, plus side clear floor space for wheelchair turning.
- Hospital family zone: Recessed hi-low ADA hydration station with sensor-activated filler, antimicrobial finishes, and quiet compressor operation.
Each layout keeps the bottle filler within reach from a wheelchair and preserves both low and high drinking fountains for code compliance.
Sample Driplife Project Scenarios
A few practical examples of how US customers use our hi-low integration solutions:
K–12 school upgrade
- Replace old coolers with ADA hi-low units plus touchless filler on the low fountain.
- Integrated filtration and bottle counter to support sustainability programs.
Corporate campus retrofit
- Add our retrofit bottle filler module above existing ADA hi-low fountains.
- Use filter kits and branding panels to align with corporate wellness goals.
Medical office build-out
- Install a fully integrated ADA hi-low drinking fountain + bottle filler combo with quiet, efficient cooling and easy-access filters in public waiting areas.
In each case, the priority is clear: maintain dual height ADA compliance, keep the bottle filler fully accessible from the wheelchair-height unit, and deliver reliable, hygienic water service that fits US facility expectations.
Common Compliance Challenges and Practical Solutions
Designing an ADA hi-low drinking fountain bottle filler combo in real U.S. buildings is rarely “plug and play.” Space limits, old construction, and mixed code interpretations all show up fast. Here’s how I handle the most common headaches and keep dual height drinking fountain ADA compliance on track.
Limited Wall Space or Corridor Depth
Tight corridors are the biggest challenge for hi-low ADA hydration station integration.
What works:
- Use recessed or semi-recessed hi-low water coolers to reduce projections.
- Choose slim bottle filling modules that stay within the 4″ projection rule when mounted in circulation paths.
- Stack the bottle filler over the low wheelchair-accessible unit and use a compact high unit beside it instead of wide side-by-side combos.
- In very tight spots, move the hi-low ADA hydration station slightly off the main egress path and keep a clear, code-compliant route.
Managing Projection Limits in Narrow Hallways
ADA and IBC both care about how far drinking fountains and bottle fillers stick into the path.
Practical moves:
- Target a max 4″ projection when installed above 27″ and below 80″ AFF in corridors.
- Use built-in frames and recess kits for dual height hydration stations in busy hallways.
- Keep the bottle filler body and control panel as flush to the wall as possible.
- If you can’t stay within 4″, relocate the unit out of the main required egress width.
Aligning ADA with Plumbing and Building Codes
ADA is federal civil rights law; plumbing and building codes are local. They don’t always line up cleanly.
How I reconcile them:
- Verify minimum fixture counts with the plumbing code, then make sure at least one low unit and one high unit meet ADA §211 and §602.
- If the plumbing code allows a “hydration station,” remember: a bottle filler does not replace the required hi-low drinking fountain.
- When there’s conflict, design to meet both ADA and the most restrictive local requirement. Document your basis in the project file.
Older Buildings That Pre-Date ADA Standards
Legacy buildings can’t always take a full tear-out, but you still need an ADA accessible bottle filler retrofit strategy.
Smart retrofit moves:
- Keep the existing hi-low frame when possible and add an ADA compliant bottle filler over the low unit.
- If wall depth is limited, use surface-mounted low-profile modules and protect them with guards instead of building deep alcoves.
- Where full compliance truly isn’t feasible, document the technical infeasibility analysis and provide the maximum accessible solution (clear floor space, reachable controls, compliant low spout).
Conflicting Inspector and Plan Reviewer Opinions
Two code officials, three opinions. It happens a lot with dual height bottle filler configuration.
How I de-risk it:
- Submit a simple diagram showing spout heights, reach ranges, projections, and clear floor space with your permit set.
- Ask for written clarification from the authority having jurisdiction (AHJ) if there’s disagreement on hi-low water cooler ADA details.
- Stick to widely recognized standards (2010 ADA, ICC A117.1) and manufacturer data sheets that clearly show ADA compliance.
Maintaining Accessibility During Renovations
Renovations can temporarily break accessibility if not planned well.
To stay compliant while you work:
- Phase work so at least one accessible hi-low drinking fountain is available on the same floor or in the same area.
- Use temporary signage leading to the nearest wheelchair accessible drinking fountain when a station is shut down.
- When moving or replacing units, treat it as an alteration under ADA §202 and bring the new configuration fully up to current standards.
Maintenance: Keeping Sensors and Filters Accessible
Even a perfect layout can fail ADA if filters, sensors, or shutoffs can’t be serviced safely and regularly.
Best practices:
- Make sure filters and shutoff valves are reachable without blocking the accessible route.
- Keep sensor windows and manual buttons easy to clean and visible – if the sensor fails, the manual control still needs to be ADA operable.
- Use simple, front-access service panels so techs don’t need to crawl under or around the low wheelchair unit.
If you’re layering in filtration at the same time, look for systems that are designed for easy service, similar to modular TDS water filter systems with strong performance specs.
Vandal Resistance vs. Operable-Part Requirements
High-traffic schools, transit hubs, and parks need tough hardware, but controls still have to be usable.
How I balance it:
- Use recessed push pads or protected sensors instead of tiny or stiff buttons.
- Specify 5 lb max operating force and one-hand operation even on vandal-resistant actuators.
- Choose bottle fillers with shrouded nozzles, tamper-resistant screws, and robust housings, but keep controls within ADA reach ranges.
Balancing Sustainability and Accessibility
Bottle fillers are usually part of a bigger sustainability push, especially in U.S. schools and offices.
To hit both goals:
- Provide at least one fully ADA compliant bottle filler on the low unit at every main hydration station.
- Combine filtered, rapid-fill bottle fillers with a standard drinking fountain spout for users without bottles.
- Use counters, signage, and refill tracking to highlight waste reduction while still protecting wheelchair access and reach range.
Internal Standards for Hi-Low Layouts
The easiest way to stay consistent across multiple buildings is to publish a simple internal standard.
What I include:
- A standard layout for an ADA hi low drinking fountain bottle filler combo (dimensions, clearances, spout heights).
- Rules like: “Bottle filler must be over the low unit wherever only one filler is installed.”
- A standard spec list for ADA dual level compliance public drinking stations and retrofit bottle filler kits your team is allowed to use.
Training Facility and Maintenance Staff
Even the best design can drift out of compliance if staff doesn’t know what to look for.
Core training topics:
- How to check spout heights, knee/toe clearance, and clear floor space during walk-throughs.
- What to avoid: trash cans, furniture, or displays blocking the ADA wheelchair clearances at fountains.
- Simple inspection checklists for controls, sensors, filters, and projections so ongoing changes don’t break your ADA hi low installation compliance guide.
With a clear standard, the right products, and basic staff training, it’s very doable to keep your hi low ADA hydration station integration spec compliant and user-friendly across all your public facilities.