
















Decoding the Digital Display: What the Lights Mean
Staring at a flashing panel can be frustrating, but that digital readout is your first line of defense. As a manufacturer, I view the User interface not just as a screen, but as a critical diagnostic tool. Before grabbing a screwdriver, we need to interpret exactly what the machine is trying to tell us. This is the foundation of any effective Bottle filler troubleshooting guide.
Visual LEDs vs. Alphanumeric Codes
Most modern hydration stations communicate issues in two distinct ways, depending on the complexity of the model:
- Status LEDs: Think of these as traffic lights. Green indicates normal operation, Yellow warns of upcoming maintenance (usually nearing filter capacity), and Red signals a critical stop condition or an expired filter that requires an immediate Filter status LED reset.
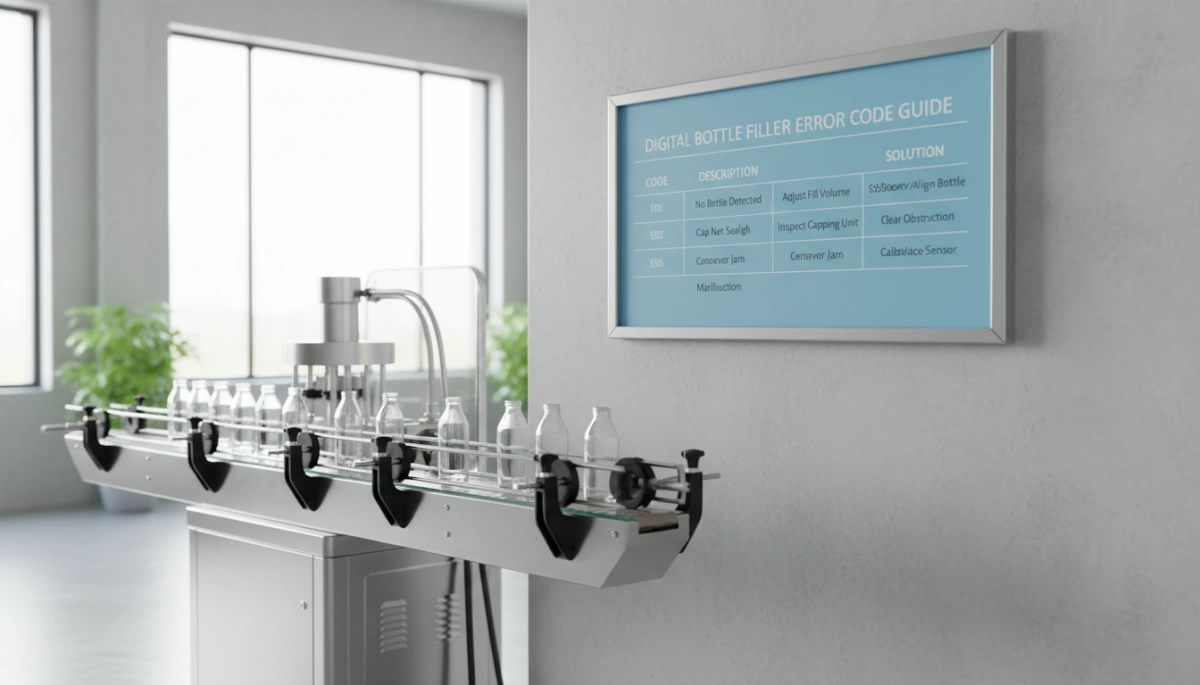
- Alphanumeric Codes: High-end units display specific text (e.g., “E013” or “Er1”). These Fault codes provide precise data points, pinpointing specific issues like a Water dispenser solenoid valve failure or a disconnected thermistor without guesswork.
Understanding the Control Board Logic
The main control board is the brain of the operation. It constantly runs System diagnostics by comparing sensor inputs against programmed baselines. If the IR sensor calibration drifts outside acceptable parameters or the flow meter detects zero movement when the valve is open, the logic circuit triggers a Troubleshooting alert.
At Driplife, we design our control boards with tight tolerances to differentiate between a momentary glitch and a genuine hardware failure. We want to ensure that when a Sensor error appears, it is actionable, preventing facility managers from wasting time chasing ghost errors. Understanding this logic is crucial before attempting any Reset procedure.
Troubleshooting Filter Status Errors

When your digital display starts blinking, it is usually screaming about the filter. Most digital bottle fillers rely on internal counters—either time-based (usually 1 year) or volume-based (gallon count)—to trigger these alerts. It is not just an annoyance; it is a critical safeguard for maintaining water quality and protecting internal components from sediment buildup.
Fixing the Red LED Replace Filter Warning
The dreaded red light is the most common support call I handle. It means your filter has hit its maximum capacity or the timer has expired. Simply swapping the cartridge won’t always kill the light; you usually have to perform a manual filter status LED reset.
- Locate the Reset Button: This is often hidden behind the bottom access panel or directly on the control board to prevent tampering.
- The 3-Second Rule: A quick press usually does nothing. You generally need to hold the button for at least 3 seconds until the light flashes green or the counter resets to 000.
- Cycle Power: If the button fails, unplug the unit for a full minute to clear the temporary memory cache.
Solving NFC Tag Recognition Issues
Newer smart dispensers use Near Field Communication (NFC) to ensure you aren’t using incompatible knock-offs. If you see an NFC filter tag error or a “Filter Missing” code, the machine isn’t reading the chip on the new cartridge.
- Check Alignment: The tag on the filter must line up perfectly with the reader on the filter head. Even a quarter-turn off can break the connection.
- Inspect the Tag: Look for physical damage to the sticker or chip on the cartridge.
- Stick to OEM: Using non-OEM water filtration system parts will often trigger this lockout code immediately because the system cannot verify the filter’s authenticity.
Diagnosing Low Flow Rate Restrictions
A water flow restriction alert often pops up when the stream turns into a trickle or the solenoid valve struggles to open. This isn’t always a digital error; often it is a physical blockage. A clogged sediment screen or a kinked supply line is usually the culprit.
However, if you are using high-grade purification, understanding how efficient countertop reverse osmosis systems work can help you distinguish between normal processing times and actual restrictions. If the flow drops suddenly rather than gradually, check the inlet pressure and the condition of the pre-filter immediately.
Fixing Sensor and Activation Glitches
There is nothing more frustrating for a user than waving a hand in front of a unit and getting absolutely nothing in return. When dealing with a touchless water dispenser sensor fault, the issue is rarely the control board itself; it’s usually environmental. Strong overhead fluorescent lights or direct sunlight can blind the IR sensors, causing them to either fail to activate or activate randomly (ghost dispensing).
Before tearing the unit apart, check the area for reflective surfaces like high-vis vests or shiny metal bottles that might be confusing the optics. A quick wipe of the sensor window with a microfiber cloth often resolves these glitches immediately.
Clearing IR Sensor Obstruction Codes
If your digital display is flashing an obstruction code, the system believes something is physically blocking the lens. This is a safety feature designed to prevent accidental flooding. In high-traffic US facilities, this is often caused by residue—think dried soap, gum, or even cleaning chemicals that have fogged up the sensor glass.
To clear this, you need to ensure the optical path is perfectly clear. If cleaning doesn’t work, the unit may require IR sensor calibration. This resets the distance baseline, teaching the sensor to ignore the permanent background and only look for a bottle.
Stopping Run-On or Stuck Dispensing
A bottle filler that won’t stop dispensing is an emergency. If the water keeps flowing after the user walks away, you are likely looking at a mechanical water dispenser solenoid valve failure rather than a software glitch. While a sensor error can tell the valve to stay open, a stuck valve is often physical.
Debris or mineral buildup inside the diaphragm can wedge the plunger open. This is common in areas with poor water quality, where the impact of hard water on internal chiller components leads to scale accumulation that jams the mechanism. If power cycling the unit doesn’t stop the flow, shut off the water supply immediately and inspect the valve assembly for calcium deposits.
Temperature and System Diagnostic Codes
When your bottle filler starts flashing temperature-related alerts, the system is usually trying to protect itself from permanent damage. These system diagnostics are critical for preventing hardware failure, especially in units that handle both heating and cooling.
Compressor and Cooling Fault Indicators
If your unit stops dispensing cold water, the digital display will often trigger a cooling system fault code. In the US market, where demand for chilled water is high, this is a common service call. Often, this code indicates that the compressor thermal overload protection has activated. This happens when the machine is pushed too hard without proper ventilation, causing the compressor to shut down to prevent burning out.
Before assuming the compressor is dead, you should perform a thermistor resistance check. If the temperature sensor (thermistor) is sending bad data to the control board, the cooling cycle won’t start even if the mechanical parts are fine. For advanced units like a countertop ice water purifier, accurate sensor readings are essential for maintaining the right ice-making conditions.
Heating Element Dry Fire Protection Errors
For 4-in-1 units that dispense hot water, we prioritize safety logic. One of the most important alerts is the dry fire protection error. This code appears if the system attempts to heat the water but detects that the hot tank is empty.
If the heating element turns on without water, it can burn out in seconds. The control board uses conductivity sensors to ensure water is present before sending power to the heater. You will typically see this error immediately after installation or a filter change if the tank hasn’t had enough time to refill completely.
Performing a Hard Reset on Digital Units
Sometimes, the logic board just gets confused. Before you start tearing off panels or ordering expensive parts, a hard reset is your best friend. It clears out temporary memory buffers that might be causing ghost errors, frozen screens, or unresponsive sensors.
Power Cycling the Bottle Filler
This is the standard IT fix for a reason—it works. To perform a basic reset procedure:
- Disconnect Power: Unplug the unit from the wall outlet or flip the breaker.
- Wait: Let it sit for at least 60 seconds. This ensures the capacitors on the control board fully discharge.
- Reconnect: Plug it back in and listen for the initialization beep.
This process forces the system diagnostics to run from scratch. It’s a similar troubleshooting step we recommend if you encounter display glitches on an instant hot water faucet or other digital appliances.
Accessing Factory Reset Menus
If a power cycle doesn’t clear the code, you need to dig into the user interface settings. Most digital bottle fillers have a hidden menu to restore factory defaults.
- Locate the Program Button: This is often hidden behind the drip tray or under a top cover to prevent tampering.
- Execute the Combo: Typically, you hold the program button for 3-5 seconds until the menu appears.
- Select Reset: Navigate to “RST” or “Factory Reset” and confirm.
This will wipe custom settings like filter timers and sensor range adjustments. If the unit refuses to reset or the display remains blank after these attempts, you are likely dealing with a hardware failure requiring a water cooler control board replacement.
Why Driplife Designs for Reliability
As a manufacturer, I know that for my clients in the United States, downtime is the enemy. Whether the unit is in a busy airport terminal or a high school hallway, it needs to work. We don’t just assemble parts; we engineer systems to minimize the need for a complex bottle filler troubleshooting guide. Our philosophy is simple: build it right the first time so you spend less time fixing it.
Smart UI and Intuitive Error Feedback
We design our interfaces to take the guesswork out of maintenance. Understanding Error Codes on Digital Bottle Filler Displays shouldn’t require an engineering degree. We prioritize a Smart UI that provides clear, actionable troubleshooting alerts rather than cryptic signals.
If a filter expiration is approaching, the display tells you plainly, avoiding the confusion often caused by a vague digital display error E013. This logic applies across our advanced machinery, similar to the intuitive controls found on our soda dispenser with ice maker, ensuring the user knows exactly what the machine needs.
Quality Control and Sensor Testing
Reliability starts on the factory floor. We implement rigorous testing protocols to catch potential sensor errors before the product ever ships.
- IR Sensor Calibration: We stress-test the activation zones to prevent touchless water dispenser sensor fault issues, ensuring the unit only dispenses when a bottle is actually present.
- Component Durability: We cycle-test to prevent water dispenser solenoid valve failure, which is a common cause of leaks and system diagnostics alerts.
- Board Logic: Every water cooler control board replacement scenario is simulated to ensure the firmware handles power fluctuations without bricking the unit.
We also verify compatibility with various filtration setups, ensuring that adding components like an ultrafiltration faucet water filter doesn’t trigger false flow restriction alarms. By focusing on these critical checkpoints, we ensure our OEM water filtration system parts stand up to the demands of the American market.
FAQ: Common Bottle Filler Error Code Questions
I know that seeing a flashing code or hearing an alarm on a unit can be frustrating. Below are the three most frequent questions I get regarding bottle filler troubleshooting guide scenarios and what those specific alerts actually mean for your facility.
Why is my bottle filler beeping?
Beeping is almost always an audible alarm for a critical status change. It typically signals one of two things:
- Filter Life Expiration: The system is alerting you that the filter capacity has reached 0% and requires an immediate swap to stop the noise.
- Leak Detection: Many digital units have moisture sensors in the base. A continuous beep often means water is detected in the bottom pan, triggering a safety lockout.
Can I bypass the filter sensor?
Technically, some older units allowed for manual resets, but modern systems use NFC technology to prevent this. We use specific tags to ensure that an authentic, safe filter is installed. Trying to bypass the NFC filter tag error or the filter status LED reset without changing the cartridge defeats the purpose of having a high-quality office water filter system. It puts users at risk of drinking unfiltered water and can void your warranty.
What does Error E013 mean?
Digital display error E013 is a communication fault code. It usually indicates that the IR sensor or the user interface board has lost connection with the main control board.
- Quick Fix: Check if the sensor lens is dirty or obstructed by debris.
- Hard Fix: If cleaning doesn’t work, check the wire harness connections between the display and the main board for loose pins.