
















Is your shower filter losing pressure months before the expiration date?
Most people assume the cartridge is dead and toss it in the trash.
Big mistake.
As a manufacturer at DripLife, I know that most “failed” filters are simply victims of sediment buildup, not chemical exhaustion. You are likely throwing away a cartridge that still has plenty of life left in it.
In this guide, you’re going to learn exactly How to Extend Shower Filter Lifespan Through Proper Maintenance.
I will break down the difference between a clogged mesh and a depleted filter, and share the specific factory-level cleaning tips to restore your water flow immediately.
Ready to stop wasting money on early replacements?
Let’s dive in.
Understanding Why Filters Fail Early (It’s Not Just the Media)
Many users assume that when a shower filter stops performing, the chemical media inside is completely exhausted. However, in our experience at DripLife, premature failure is often physical, not chemical. To truly extend shower filter lifespan through proper maintenance, you first need to understand the difference between a filter that is chemically spent and one that is simply clogged.
Chemical vs. Physical Failure Explained
A multi-stage filtration system operates on two levels. Chemical failure occurs when active ingredients like KDF-55 media or Calcium Sulfite have absorbed their maximum capacity of chlorine and heavy metals. At this point, toxins pass through untreated.
Physical failure, on the other hand, is a flow issue. This happens when particulate matter physically blocks the water’s path. If your water pressure drops significantly but the water still smells clean, you are likely dealing with a physical blockage rather than activated carbon exhaustion.
The ‘Sacrificial’ Layers: High-Density Mesh and PP Cotton
Our 15-stage cartridges are engineered with specific “sacrificial” layers at the entry and exit points. These layers—specifically the High-Density Stainless Steel Mesh and Microporous PP Cotton—act as the first line of defense.
- Role of the Mesh: Traps large debris like rust flakes and sand.
- Role of PP Cotton: Captures finer turbidity and suspended solids.
These layers prevent large particles from coating the deeper, more expensive media stages like the Vitamin C or Alkaline balls. Pre-filter mesh maintenance is critical because if these layers get choked, the entire system loses pressure, regardless of the health of the inner layers.
Why Sediment Clogs Before Carbon Expires
In areas with old plumbing or well water, sediment buildup removal becomes the primary maintenance challenge. Carbon and KDF media have a massive surface area for chemical absorption, meaning they can theoretically last for months. However, physical sediment accumulates much faster.
If hard water mineral deposits or silt coat the exterior mesh or the initial PP cotton layer, water cannot reach the carbon stage effectively. This results in a filter that is technically still chemically potent but functionally useless due to restricted flow. Recognizing this distinction is the first step in applying preventive maintenance to extend cartridge life.
Step 1: The Back-Flush Technique to Restore Flow
What is Back-Flushing?
When you notice a dip in pressure, it doesn’t always mean your cartridge is chemically exhausted. Often, it is simply a physical blockage at the entry point. Shower filter back-flushing is the process of reversing the direction of water flow through the cartridge. This pushes trapped sediment, rust, and large particles away from the intake mesh, effectively clearing the “physical” clog without needing a replacement. This is crucial for water flow rate optimization, ensuring your 15-stage system continues to deliver the high-pressure experience we designed it for.
Step-by-Step Guide to Reversing Flow
To perform sediment buildup removal safely and restore performance, follow these steps:
- Disconnect the Housing: Unscrew the shower filter housing from the shower arm. Since DripLife units use universal G1/2” threads, you typically won’t need tools.
- Flip the Cartridge: Open the housing and remove the internal cartridge. Identify the outlet side (where water usually exits).
- Force Water Through: Press the outlet side firmly against a faucet and run water through it backwards for 1-2 minutes. You want the water to exit through the intake screen, carrying debris with it.
- Tap and Rinse: Gently tap the cartridge against the sink to loosen stubborn particles, then rinse again.
DripLife Pro Tip: Loosening Calcified Debris
Hard water minerals can act like glue, binding sediment to the mesh. If a standard rinse doesn’t work, understanding the impact of water temperature on filtration efficiency is key; running moderately warm water helps dissolve temporary bonds without damaging the internal media. While flushing, give the cartridge a firm shake. This mechanical agitation helps break up calcified layers on the mesh screen, helping you extend lifespan maintenance shower filters effectively.
Step 2: Cleaning the Housing and Mesh Screens
We often focus so much on the internal cartridge that we forget the exterior housing and the stainless steel mesh screens are the first line of defense. If these physical barriers get clogged with sediment or scale, the water pressure drops, and the internal filter media can’t do its job effectively. Regular pre-filter mesh maintenance ensures that water flows evenly through the 15-stage system rather than channeling through a single path.
The Vinegar Soak for Limescale Removal
Hard water mineral deposits are the silent killers of shower pressure. Calcium and magnesium buildup can cement the mesh screen shut, restricting flow. Instead of scrubbing with abrasives that scratch the finish, use a simple chemical reaction to do the work.
- Disassemble: Unscrew the housing and remove the metal mesh screen washer.
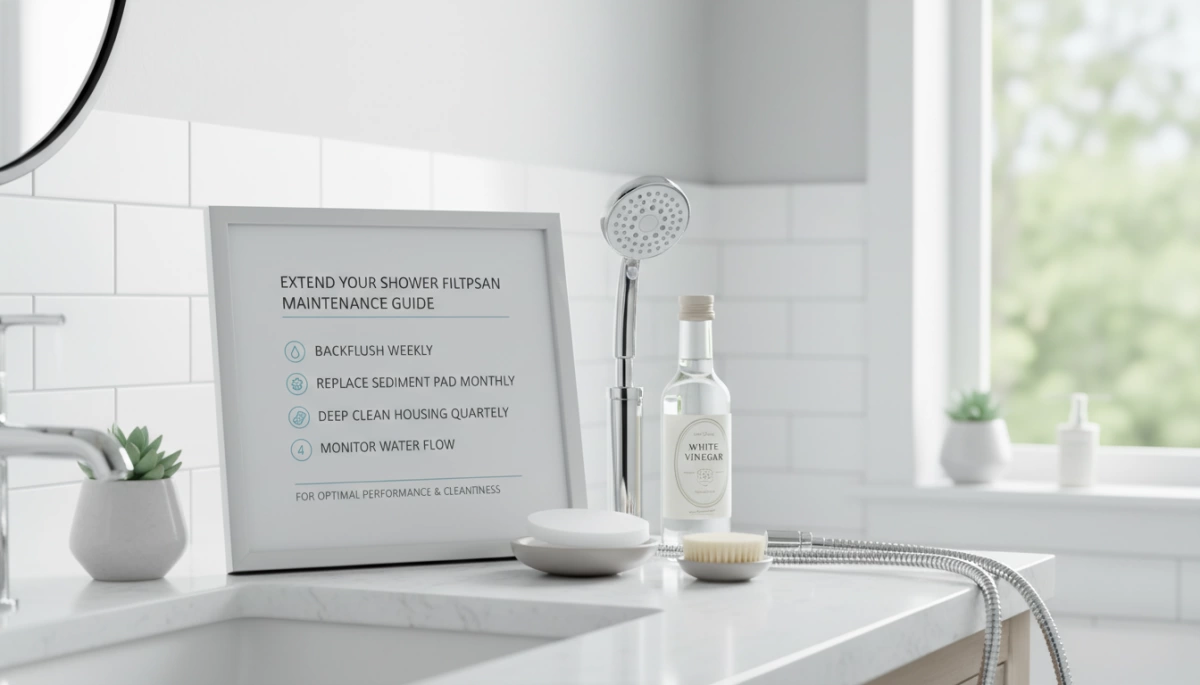
- Soak: Submerge the screen and the shower head nozzle in a bowl of white vinegar for 30–60 minutes.
- Rinse: Scrub gently with an old toothbrush and rinse with warm water.
This process dissolves the buildup and restores flow without damaging the components. Keeping these parts clean is also crucial for hygiene, as stagnant buildup can sometimes lead to issues like mold in water filter housings if neglected for too long.
Lubricating O-Ring Seals to Prevent Leaks
A watertight seal is essential for maintaining the high-pressure output our systems are known for. Over time, the rubber O-rings and gaskets can dry out or crack, leading to leaks that bypass the filtration stages entirely.
- Inspect: Check the O-rings every time you swap a cartridge. Look for cracks or flattening.
- Lubricate: Apply a tiny amount of food-grade silicone grease to the O-rings. This O-ring seal lubrication keeps the rubber pliable and ensures a snug fit against the G1/2” threads.
- Reseat: Ensure the washer sits flat before tightening to prevent pinching.
Warning: Avoiding Harsh Chemicals on Plastic
While our filter housings are built from durable materials designed to withstand heat and pressure, they are not immune to chemical damage. Never use bleach, ammonia, or abrasive industrial cleaners on the filter housing. These harsh chemicals can cause stress cracks in the plastic, leading to catastrophic failure under pressure. Furthermore, chemical residues can seep into the filtration chamber, potentially degrading the KDF-55 and calcium sulfite layers or affecting the impact of VC scented filters on shower head longevity. Stick to mild soap and water or vinegar for all maintenance tasks to keep the system safe and functional.
Step 3: Managing Water Temperature and Pressure
The Heat Factor: Why Boiling Water Damages Media
While DripLife filters are built tough, extreme heat is the enemy of filtration efficiency. Running water near the boiling point doesn’t just scald your skin; it compromises the chemical structure of the media. Specifically, very hot water can cause the activated carbon to expand and release previously trapped contaminants back into the stream. Furthermore, the Vitamin C layer used for skin health degrades rapidly under extreme heat. To prevent KDF-55 media degradation and keep the carbon effective, stick to comfortable, warm temperatures rather than scalding hot settings. Understanding the role of KDF in prolonging active carbon life helps explain why maintaining a stable temperature range is critical for the chemical balance inside the cartridge.
Avoiding ‘Water Hammer’ and Channeling
Water hammer occurs when valves are shut off or opened too quickly, sending a shockwave through your plumbing. For a shower filter, this sudden force can pack the filtration beads too tightly or crack the internal housing. Even more common is “channeling.” If water is forced through at maximum pressure instantly, it may carve a single tunnel through the sediment and beads. This means the water bypasses the multi-stage filtration system entirely, resulting in untreated water hitting your skin.
Gradual Pressure Regulation Tips
Our units are engineered as high-output shower filters, but treating them gently extends their run time.
- Ease the Handle: Turn your shower handle slowly to allow the housing to fill evenly before hitting full pressure.
- Consistent Flow: Avoid rapid fluctuations in pressure during a single shower.
- Check the Regulator: If your home has unusually high water pressure (over 80 psi), consider installing a pressure regulator to protect both your pipes and the filter seals.
- Flow Optimization: Proper water flow rate optimization ensures the water spends enough time in contact with the media to effectively remove chlorine and heavy metals.
Hard Water Hacks and Pre-Filtering Strategies
Dealing with hard water requires a bit more strategy than standard city water. If you are living in an area with high mineral content or relying on a private well, hard water mineral deposits can calcify inside your unit faster than expected. We see this often: the chemical media (like the KDF-55) is still active, but the physical flow is choked off by heavy minerals.
Dealing with Extreme Sediment and Well Water
For those on well water, sediment buildup removal becomes a weekly chore rather than a monthly one. Well water often carries larger particulate matter—sand, rust, and silt—that hits the high-density stainless steel mesh of our filters first. If this mesh gets overwhelmed, water flow drops drastically.
- Check the washer: Ensure the sand washer (mesh screen) at the inlet is clear of debris.
- Monitor flow: A sudden drop in pressure usually means physical blockage, not chemical exhaustion.
Using Spin-Down Filters at Entry Points
If you find yourself cleaning the shower filter mesh every few days, your water supply might need a heavy-duty bouncer at the door. Installing a spin-down sediment filter at your home’s main water entry point is a game-changer. It catches the heavy grit before it ever reaches your bathroom, allowing your multi-stage filtration system to focus on what it does best: removing chlorine and heavy metals, rather than acting as a glorified sieve.
Cleaning Shower Head Nozzles to Reduce Back-Pressure
Maintenance isn’t just about the filter cartridge; it’s about the exit point too. When shower head limescale cleaning is neglected, mineral deposits block the silicone nozzles. This blockage creates back-pressure that forces water to push harder against the internal filter stages, potentially causing “channeling” where water cuts a path through the media instead of flowing evenly.
- Rub the nozzles: Our DripLife heads feature easy-clean silicone nozzles; simply rub them with your thumb to dislodge calcium.
- Soak if needed: For stubborn buildup, remove the head and soak the faceplate in vinegar to dissolve the scale and restore water flow rate optimization.
Signs Maintenance Won’t Work and You Must Replace
Maintenance extends the life of your unit, but the filtration media inside—specifically the 15-stage blend of KDF-55, Calcium Sulfite, and Activated Carbon—eventually reaches total saturation. Once the chemical absorption capacity is maxed out, no amount of rinsing or back-flushing will restore its effectiveness. You need to recognize when the replacement cartridge cycle has officially ended to keep your water clean.
The ‘Sniff Test’: Detecting Chlorine Breakthrough
The most immediate indicator of failure is odor. Our filters are engineered to strip distinct chemical smells from municipal water. If your shower steam starts smelling like a public swimming pool, you are experiencing chlorine breakthrough. This means the activated carbon exhaustion point has been reached, and the granules can no longer trap contaminants.
Visual Cues: Persistent Cloudy Water
If your water remains murky or flow is drastically reduced even after cleaning the mesh screens, the internal structure is likely compromised.
- Sediment Saturation: The high-density stainless steel mesh and PP cotton layers are packed with debris that cannot be dislodged.
- Media Breakdown: In rare cases, old media can degrade physically, contributing to turbidity.
Dermatological Signs: Dry Skin and Brittle Hair Returning
The core benefit of a DripLife system is the physical improvement in hair and skin health. When the KDF-55 media degradation occurs, heavy metals and free chlorine pass through to your body.
- Itchy Skin: A return of post-shower dryness or scalp irritation suggests the Vitamin C and alkaline stages are depleted.
- Frizzy Hair: Hard water minerals are no longer being neutralized, leading to breakage and dullness.
If you notice these symptoms, it is time to stop maintenance efforts and install a fresh cartridge or upgrade to a durable Aluminum Alloy Shower Filter to ensure you aren’t washing with contaminated water.
The DripLife Advantage: Designed for Durability
When we engineered our multi-stage filtration system, we didn’t just focus on water purity; we focused on longevity. Standard filters often fail because they rely on a single medium that exhausts quickly. Our 15-stage design distributes the workload across different materials, ensuring that no single layer bears the brunt of the filtration process alone. This balanced approach is key to maintaining consistent water pressure and extending the replacement cartridge cycle.
Layer Breakdown: Ceramic Balls and KDF-55
The secret to our filter’s lifespan lies in the strategic arrangement of the media. We don’t just dump ingredients into a canister; we layer them to optimize performance.
- KDF-55 & Calcium Sulfite: We use high-grade KDF-55 to tackle heavy metals and chlorine, specifically in hot water environments where other media might fail. This layer acts as a shield, protecting the subsequent stages from rapid exhaustion and slowing down KDF-55 media degradation.
- Ceramic Balls & Activated Carbon: These layers polish the water and adjust pH. By combining these with a robust calcium sulfite layer, we ensure the system handles contaminants efficiently, unlike basic carbon water filter systems that may clog faster without these pre-filtration stages.
Universal Fit and Proper Thread Tightening
Durability also comes down to the physical connection. We utilize standard G1/2” threads for a universal fit compatible with fixed, handheld, and rainfall shower heads. Proper installation is the first step in maintenance; a loose seal leads to leaks that bypass the filter entirely, reducing its effectiveness.
When evaluating filter cartridge connection types, you will find that our precision-cut threads and included Teflon tape ensure a watertight seal without requiring professional tools. This secure fit prevents pressure loss and ensures every drop of water passes through the filtration media as intended, preventing the bypass issues that often shorten the usable life of lesser units.
FAQ: Common Questions About Shower Filter Maintenance
Can I wash the activated carbon beads inside?
No, do not attempt to open the cartridge. The internal components, including the activated carbon and calcium sulfite layers, are packed in a specific 15-stage sequence to ensure maximum filtration. Opening the casing disrupts this density and renders the unit ineffective.
- Chemical Reality: You cannot “wash” chemicals out of carbon. Once activated carbon exhaustion occurs, the adsorption sites are full of chlorine and impurities.
- Focus Area: Direct your cleaning efforts toward pre-filter mesh maintenance on the exterior to clear physical debris, rather than trying to clean the internal media.
How often should I perform the back-flush?
If your model allows for back-flushing to clear physical blockage, we generally recommend doing this only when you notice a significant drop in pressure. For most users, this isn’t a weekly task.
- Frequency: Every 4 to 6 weeks is sufficient for sediment buildup removal in areas with older plumbing.
- Purpose: This step is strictly for water flow rate optimization. It helps clear the physical mesh screens but does not extend the chemical life of the KDF-55 or Vitamin C stages.
Will high iron content ruin the filter faster?
Yes, high iron concentrations are the primary cause of premature KDF-55 media degradation. Iron physically coats the filtration beads, creating a barrier that prevents the media from neutralizing chlorine and heavy metals effectively.
- Lifespan Impact: While our filters are designed for durability, extreme iron levels (common in well water) can shorten the replacement cartridge cycle from the standard 6 months to as little as 3 months.
- System Check: If you are dealing with severe mineral issues throughout your home, understanding the differences between water softeners and filters is crucial to determining if you need a whole-home pre-treatment solution to protect your point-of-use shower filter.